Amazon Lightsail is a fixed monthly priced VPS service offered by AWS. Once you install the OS of your choice, you can run almost any application. In this application, I'm showing how to deploy one of my favorite backend frameworks called Laravel. Which most of you might hear of. Let's deploy it.
I don't like/know Laravel
It's totally fine if you don't like or know Laravel. Laravel is just the framework I choose to demo but it can be any app. It can be Node.js, Python, Django, Fast API, Ruby on Rails, or any other app. The idea is the same, but some of the steps in deployment will be different.
Prerequisites
You need a Laravel app to deploy. Don't worry if you don't have one, I have to best Laravel (v9) app you can find in the internet (pun intended).
Let's deploy our Laravel app. 📦👉☁️
Create Amazon Lightsail Instance
Go to Lightsail homepage. Click on the Create instance button under Instances tab.
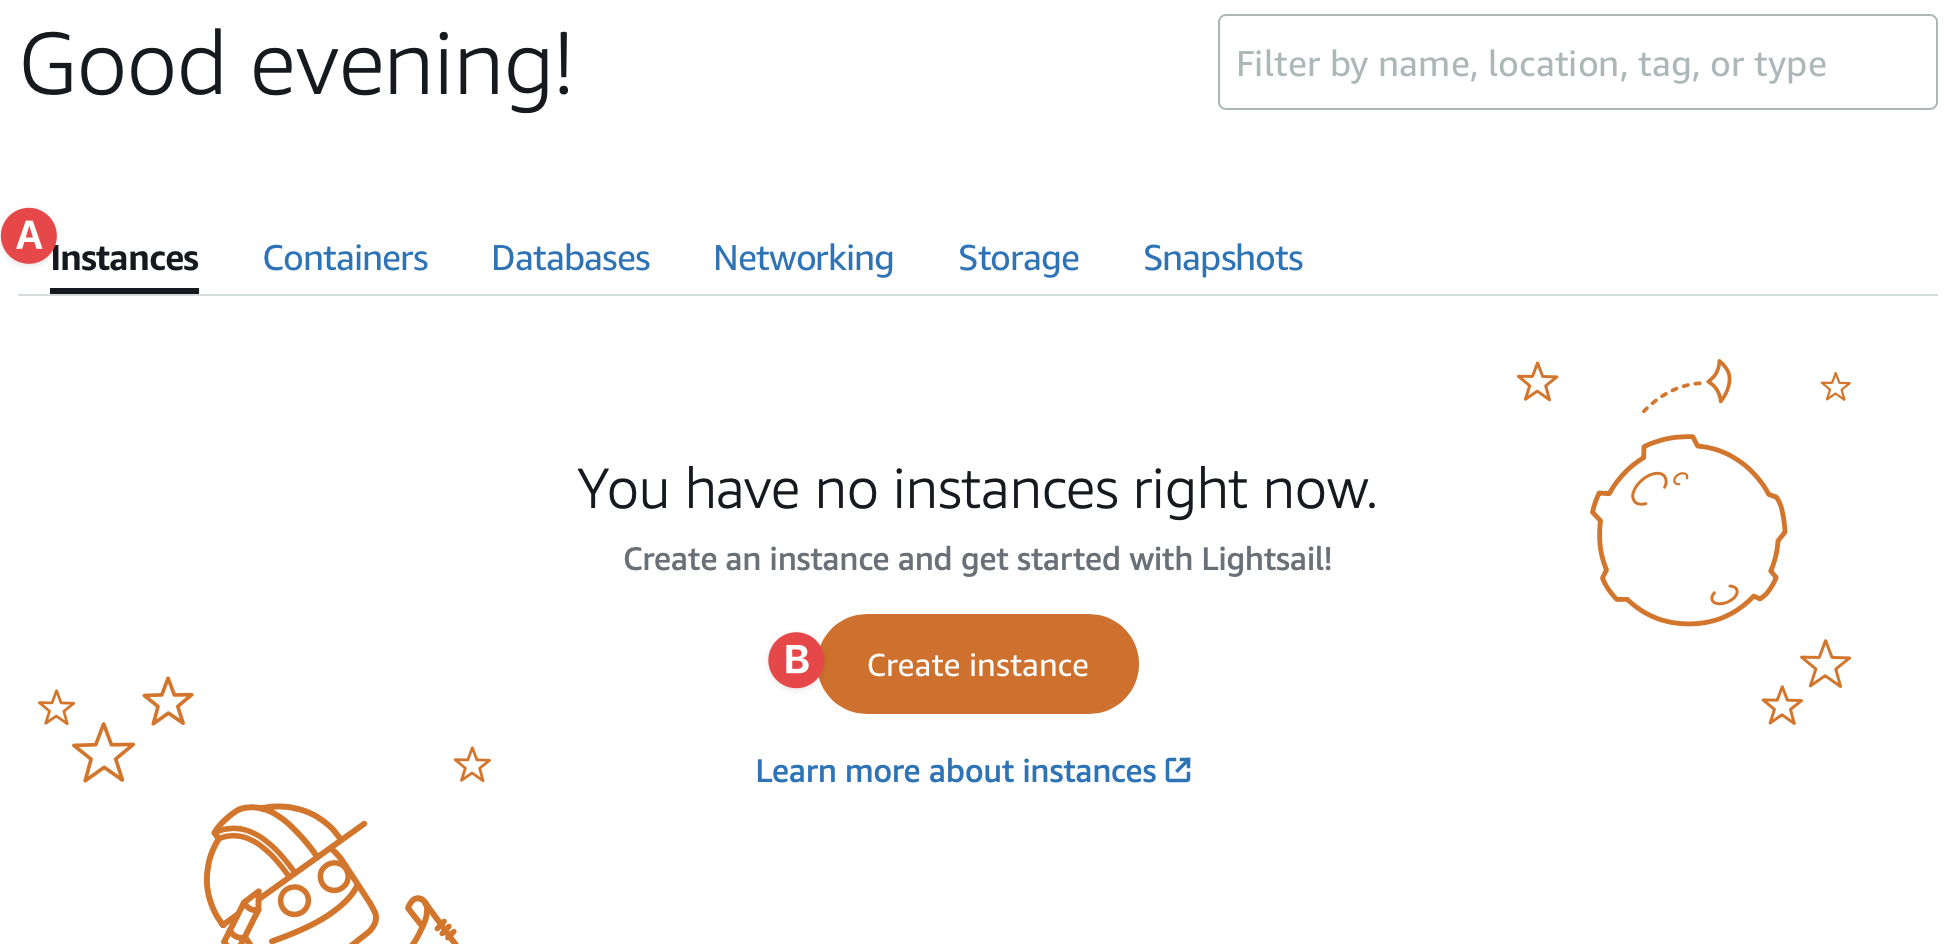
You will land on the Create instance page. We will use Ubuntu for this demo but you are open to choosing the OS of your choice.
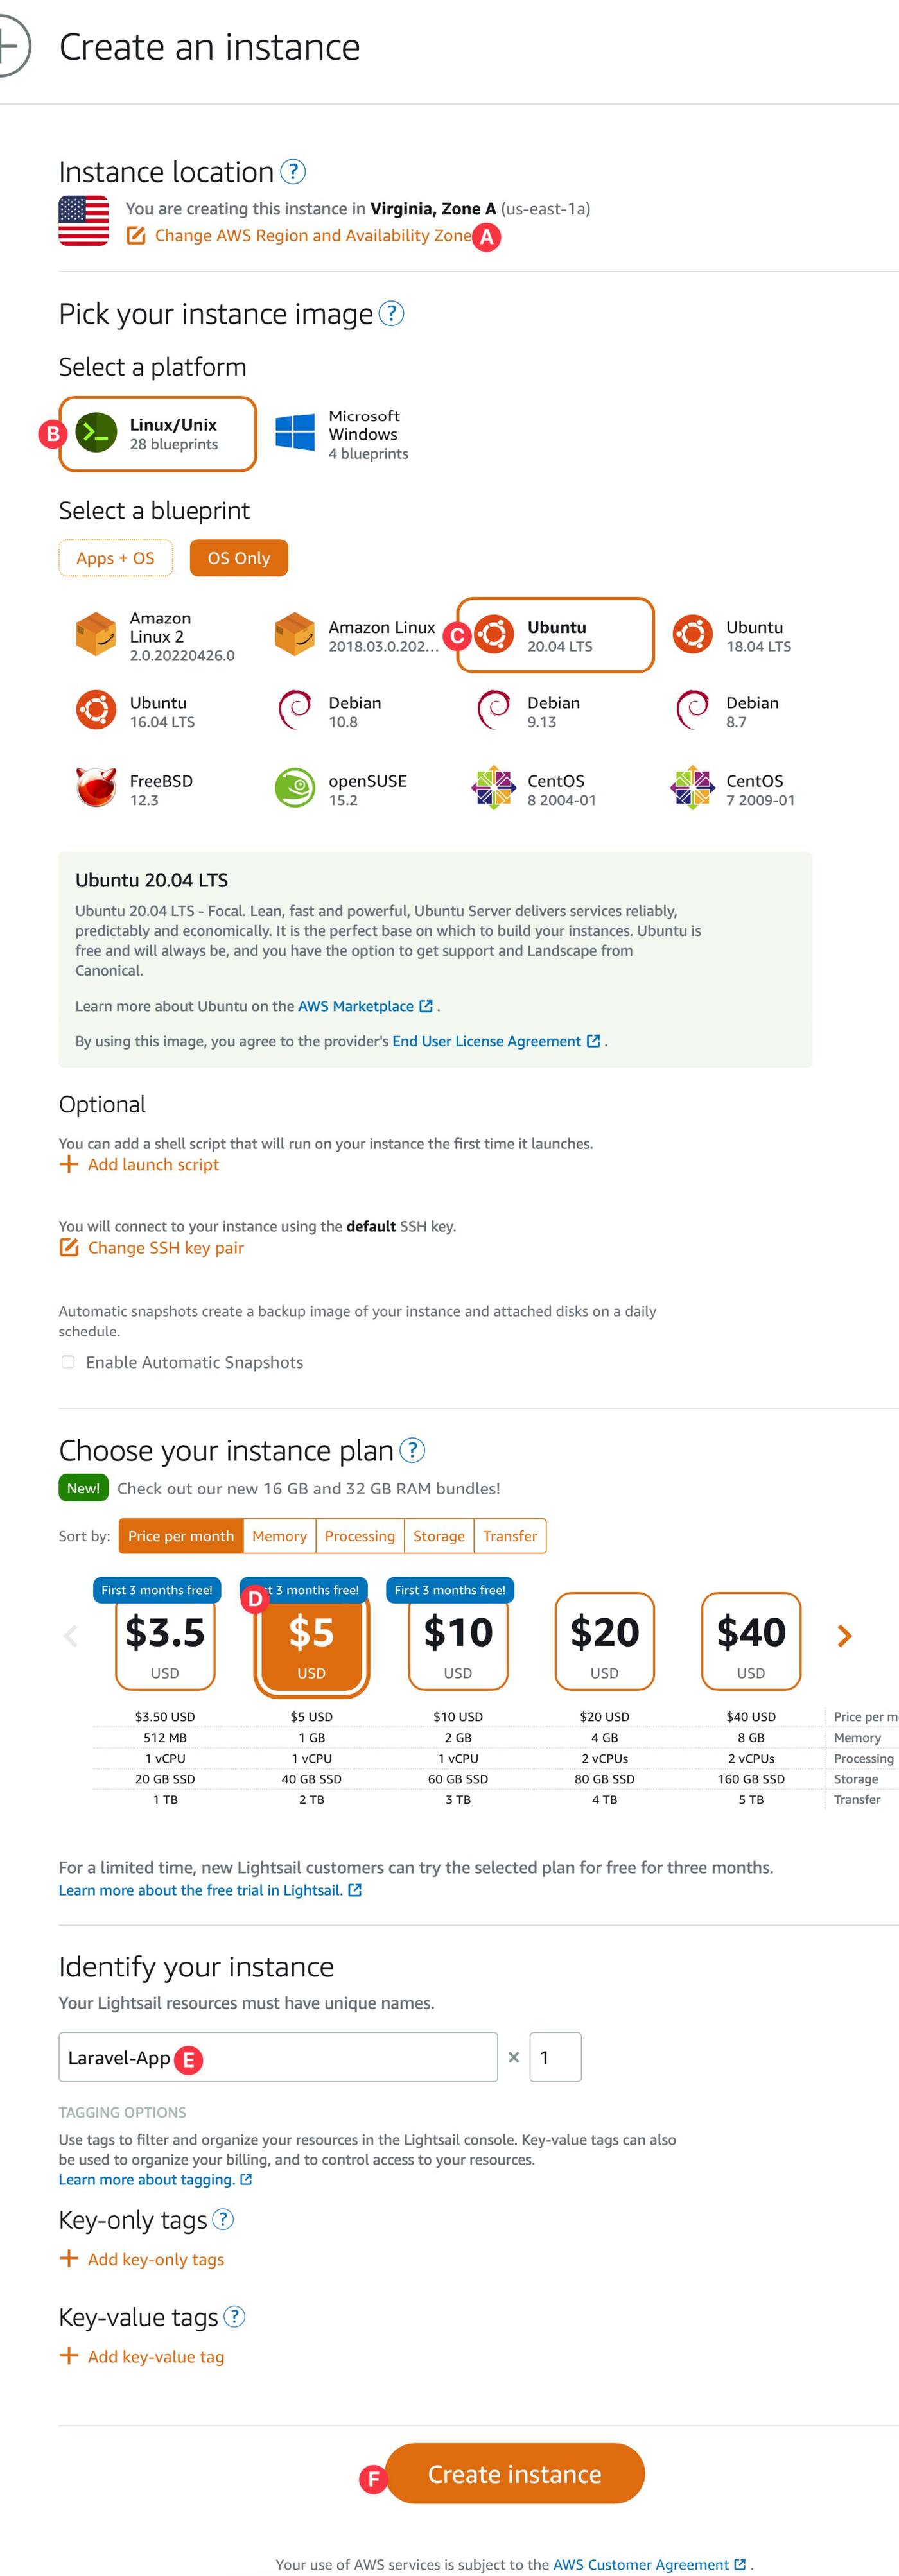 (A) Change the AWS Region and Availablity Zone (AZ) of your choice if not the correct one selected. (B) Select Linux/Unix platform. (C) Select Ubuntu (20.04 LTS) as OS. The blueprint should be OS Only. (D) Choose a plan. (E) Give it a name, and (F) Hit the Create instance button from the bottom of the page.
Your instance is in the Pending state. Will be Running in a few minutes.
Assign a static IP
Read how to assign a Static IP to an Amazon Lightsail Instance.
Connect to the instance using SSH
ℹ️ I described in detail How to connect to an Amazon Lightsail instance using SSH.
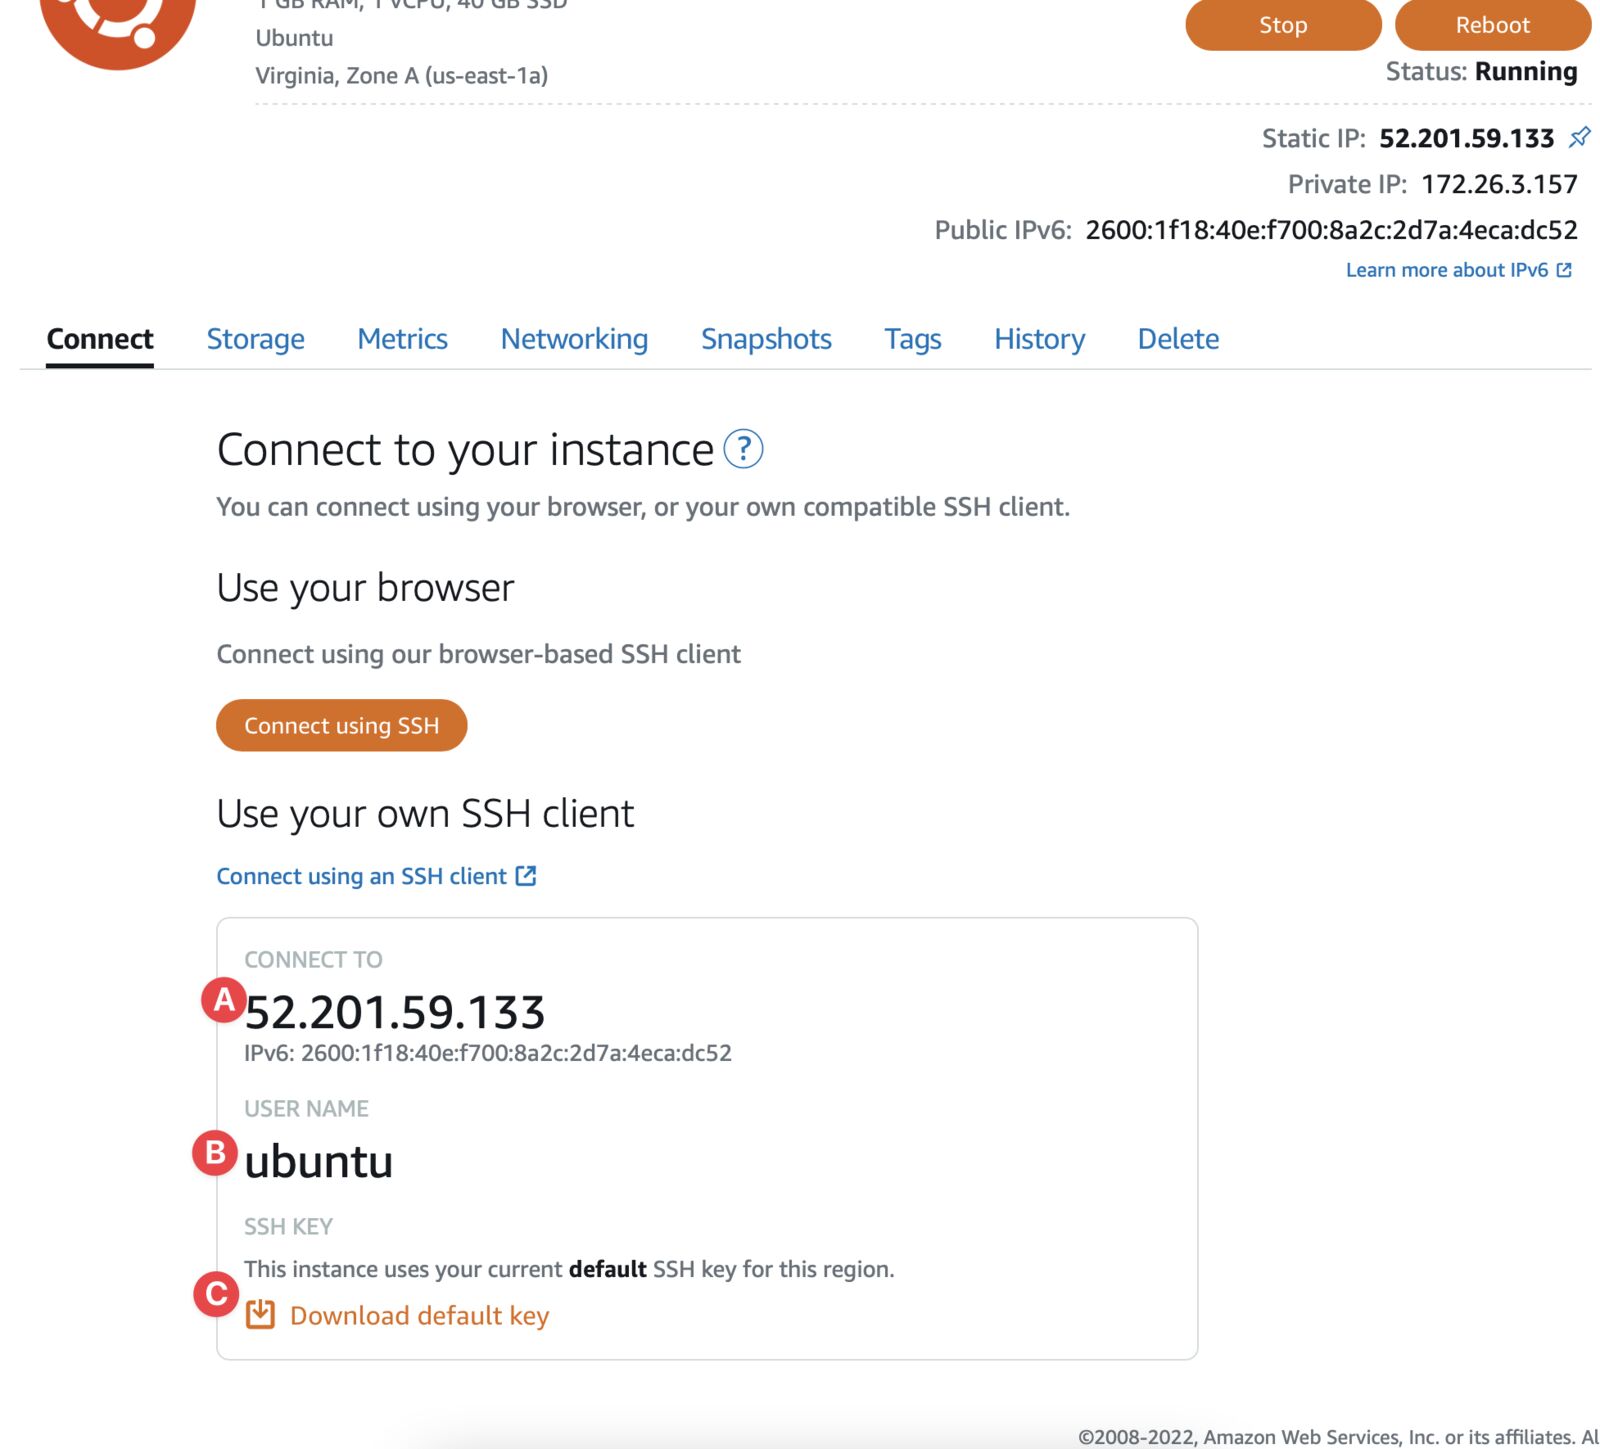
Go to the instance page by clicking on the name. And go to the Connect tab. We need these 3 things: (A) Public IP, (B) SSH Username, and (C) Download the SSH Key.
Change permission of Key file:
chmod 400 path/to/keyfile.pem
Connect to the SSH
ssh -i "path/to/keyfile.pem" <username>@<ip_address>
If you are asked to add IP to known hosts, type yes and you should be logged in.
Installing Necessary Scripts
Our server is created and it's empty. You can install any script you want, depending on what you need. In this demo, we are going to use Laravel. You can follow along even if you have a different app/stack.
Update package information
sudo apt-get update
Some packages
sudo apt install curl git unzip -y
Install PHP
I love the latest PHP 8.1. It's not officially available in Ubuntu 20.04 yet. We will enable the PHP Repository to install PHP 8.1.
sudo apt install software-properties-common -y
sudo add-apt-repository ppa:ondrej/php -y
sudo apt install php8.1-fpm php8.1-cli php8.1-mysql php8.1-curl php-xml php-mbstring -y
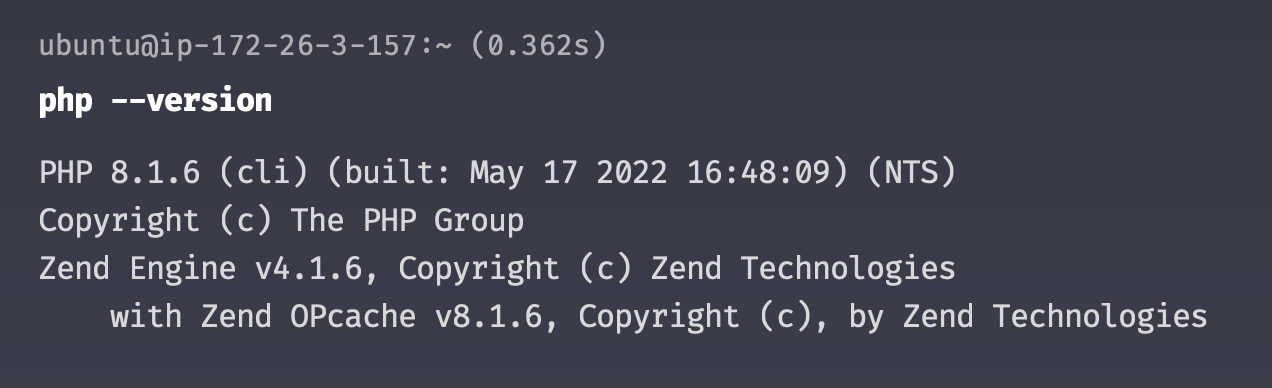
Check php version by using php --version command. You should see something like this:
Install Composer
curl -sS https://getcomposer.org/installer | php
sudo mv composer.phar /usr/local/bin/composer
sudo chmod +x /usr/local/bin/composer
Install Nginx & configure nginx
sudo apt install nginx -y
Clone your application repo
cd /var/www/html
sudo git clone https://github.com/HarunRay/laravel-to-lightsail.git
cd laravel-to-lightsail
cp .env.example .env
sudo composer install
Create a nginx config file
sudo vim /etc/nginx/sites-available/laravel
Paste this code. Change 52.201.59.133 to your IP address and save.
server {
 listen 80;
 listen [::]:80;
 server_name 52.201.59.133;
 root /var/www/html/laravel-to-lightsail/public;

 add_header X-Frame-Options "SAMEORIGIN";
 add_header X-Content-Type-Options "nosniff";

 index index.php;

 charset utf-8;

 location / {
     try_files $uri $uri/ /index.php?$query_string;
 }

 location = /favicon.ico { access_log off; log_not_found off; }
 location = /robots.txt  { access_log off; log_not_found off; }

 error_page 404 /index.php;

 location ~ \.php$ {
     fastcgi_pass unix:/var/run/php/php8.1-fpm.sock;
     fastcgi_param SCRIPT_FILENAME $realpath_root$fastcgi_script_name;
     include fastcgi_params;
 }

 location ~ /\.(?!well-known).* {
     deny all;
 }
}
Now, run this:
sudo ln -s /etc/nginx/sites-available/laravel /etc/nginx/sites-enabled/
sudo systemctl start nginx
sudo systemctl enable nginx
Set Laravel App Permission
cd /var/www/html/laravel-to-lightsail/
sudo chown -R www-data:www-data .
sudo usermod -a -G www-data ubuntu
sudo find . -type f -exec chmod 644 {} \;
sudo find . -type d -exec chmod 755 {} \;
sudo chgrp -R www-data storage bootstrap/cache
sudo chmod -R ug+rwx storage bootstrap/cache
Generate app key
sudo php artisan key:generate
Update the .env file
Open file
sudo vim /var/www/html/laravel-to-lightsail/.env
Now, change these values;
APP_ENV=production
# Change IP to yours
APP_URL=http://52.201.59.133
Now go to your public IP address. Mine is http://52.201.59.133. You should see this welcome page.
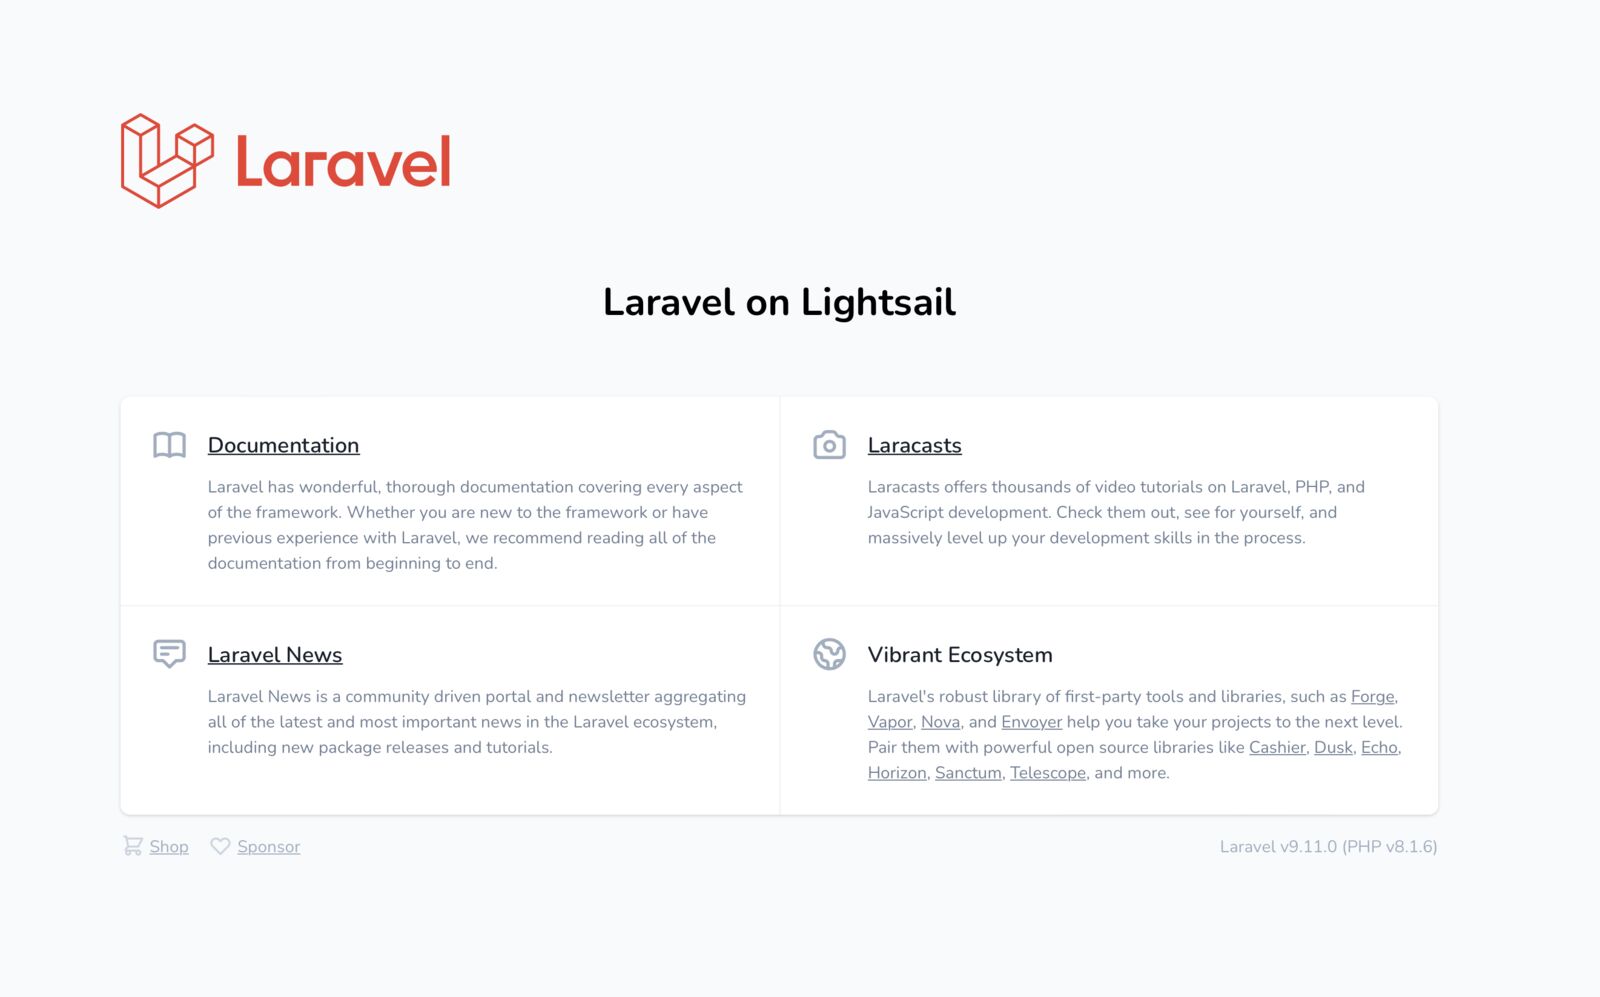
Congratulations, your Laravel app launched on Amazon Lightsail instance. 🚀
Conclusion
In the next few articles, we are going to configure the database, load balancer & Redis (Elasticache). Follow me and subscribe to my newsletter.
On this post
Comments
A reply stays under the note it answers.
No comments yet.
If you have a note on Deploy Laravel Application to Amazon Lightsail, sign in and leave it.