Everyone loves to deploy their applications to the Amazon EC2 instance. It's easy to deploy and maintain. This tutorial will launch a Laravel application to an EC2 instance.
What is EC2?
Amazon Elastic Compute Cloud (EC2) is one of the first offerings of Amazon Web Services (AWS). It's a computing service, and you can virtually launch applications of any size securely and reliably.
Prerequisites
- You need a Laravel application. If you don't have one, you can use this example app to deploy.
P.S.: You don't need a Laravel app; you can use any application of your choice. Ideas are the same; just a few deployment steps are different.
So, what are you waiting for? Let's go ahead and deploy your app to an EC2 instance. ☁️
Create Key Pairs
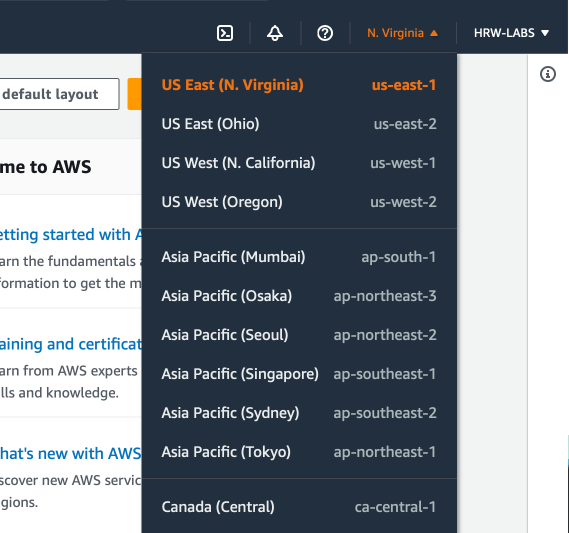
Login to AWS Management Console, and select the correct region from the top-right corner:
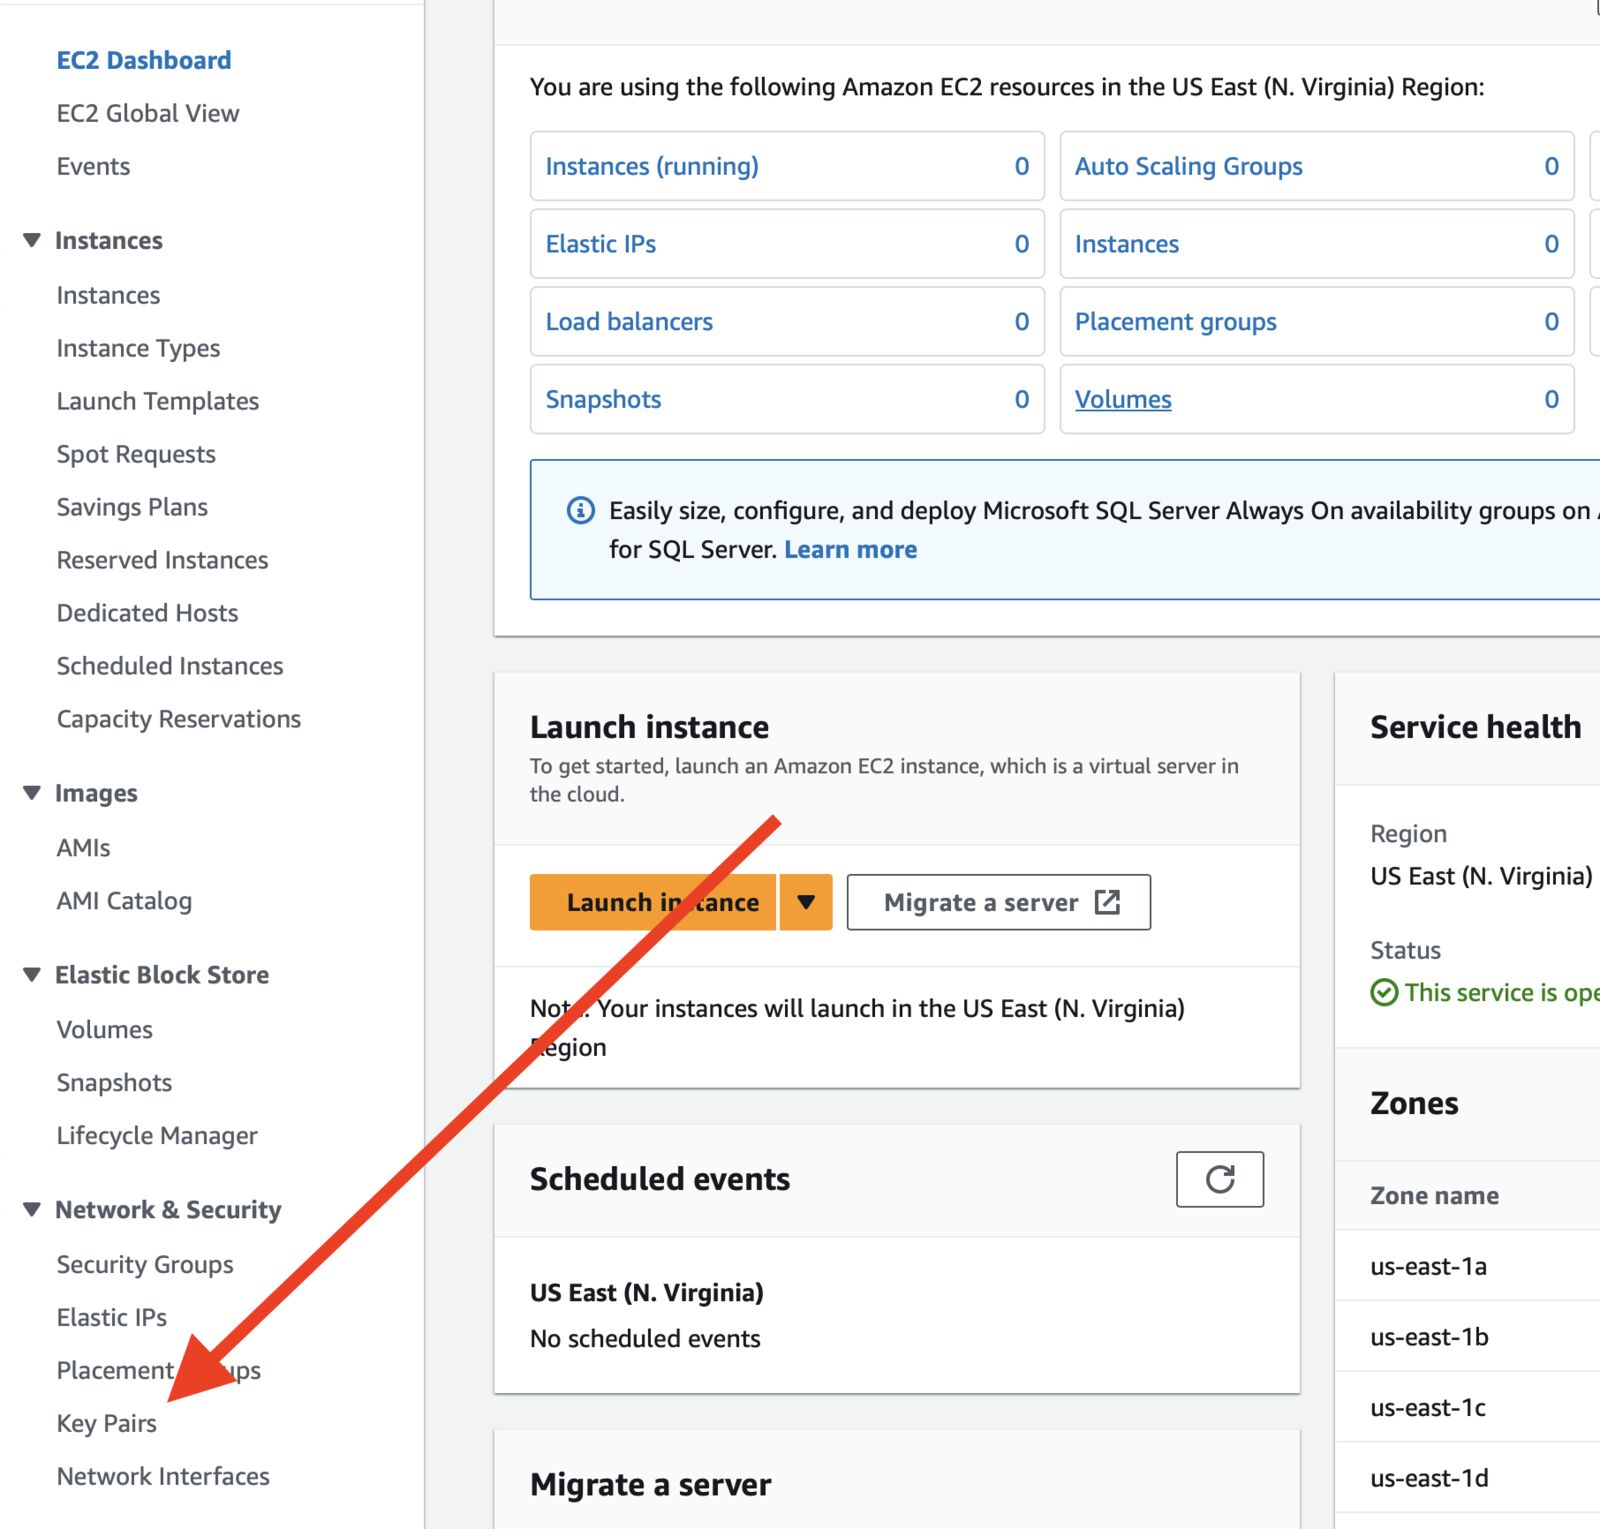
Now, go to EC2 Console, and click on the Key Pairs button under Network & Security:
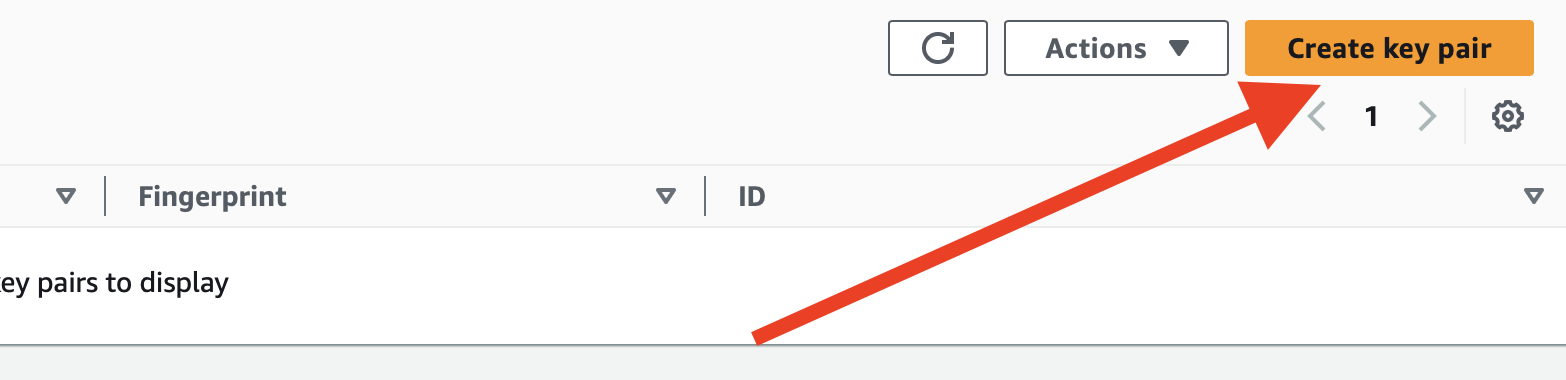
Click on Create key pairs from the top-right corner:
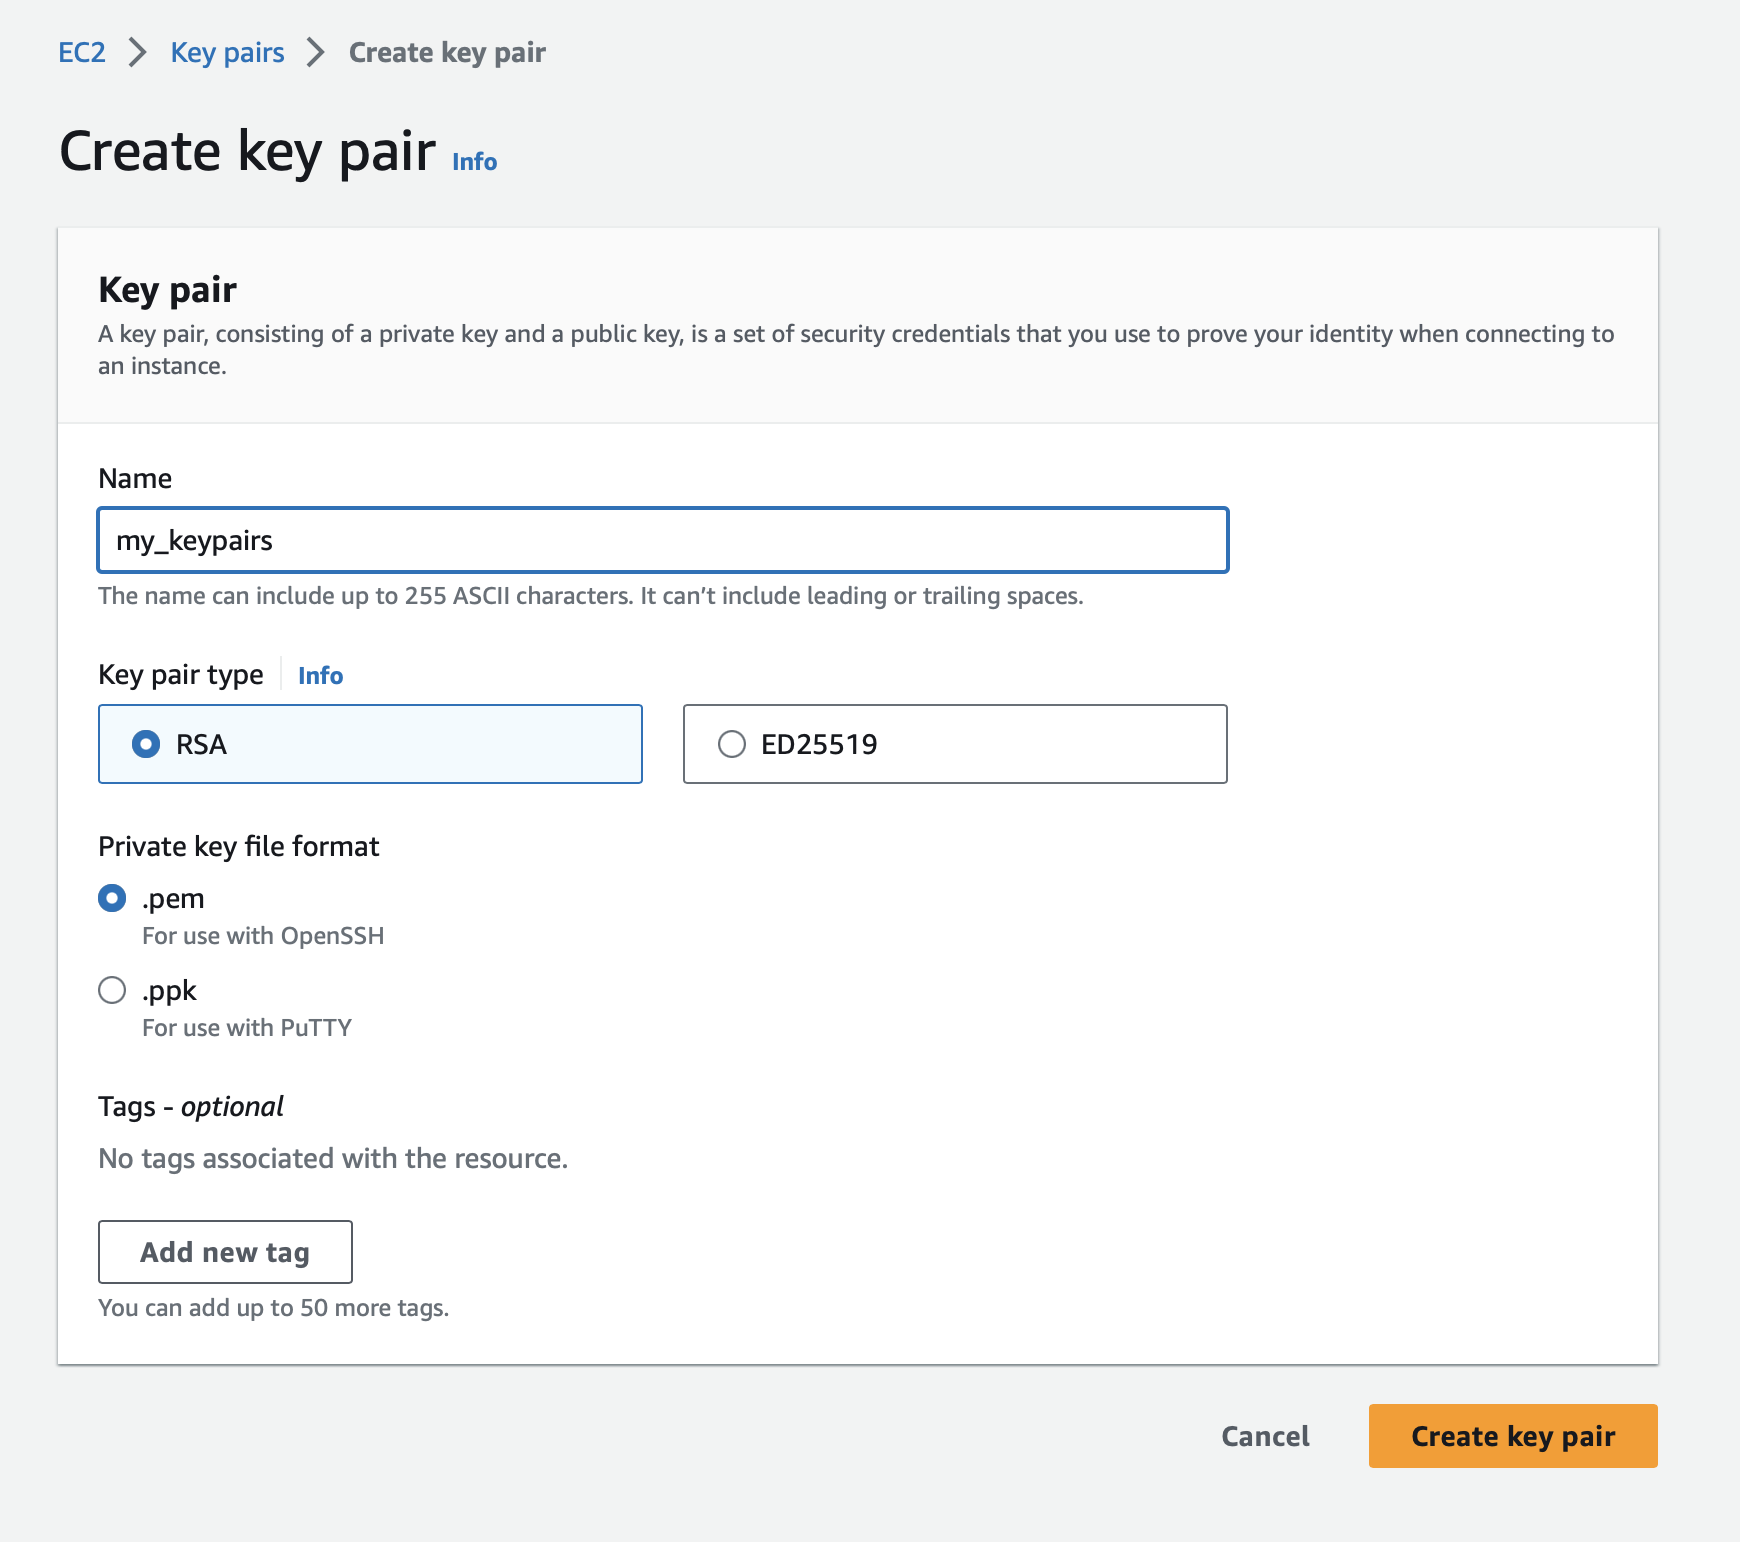
Give it a name and click Create key pairs. It will download the keypair file and keep it in a safe place for later.
Launch an EC2 Instance
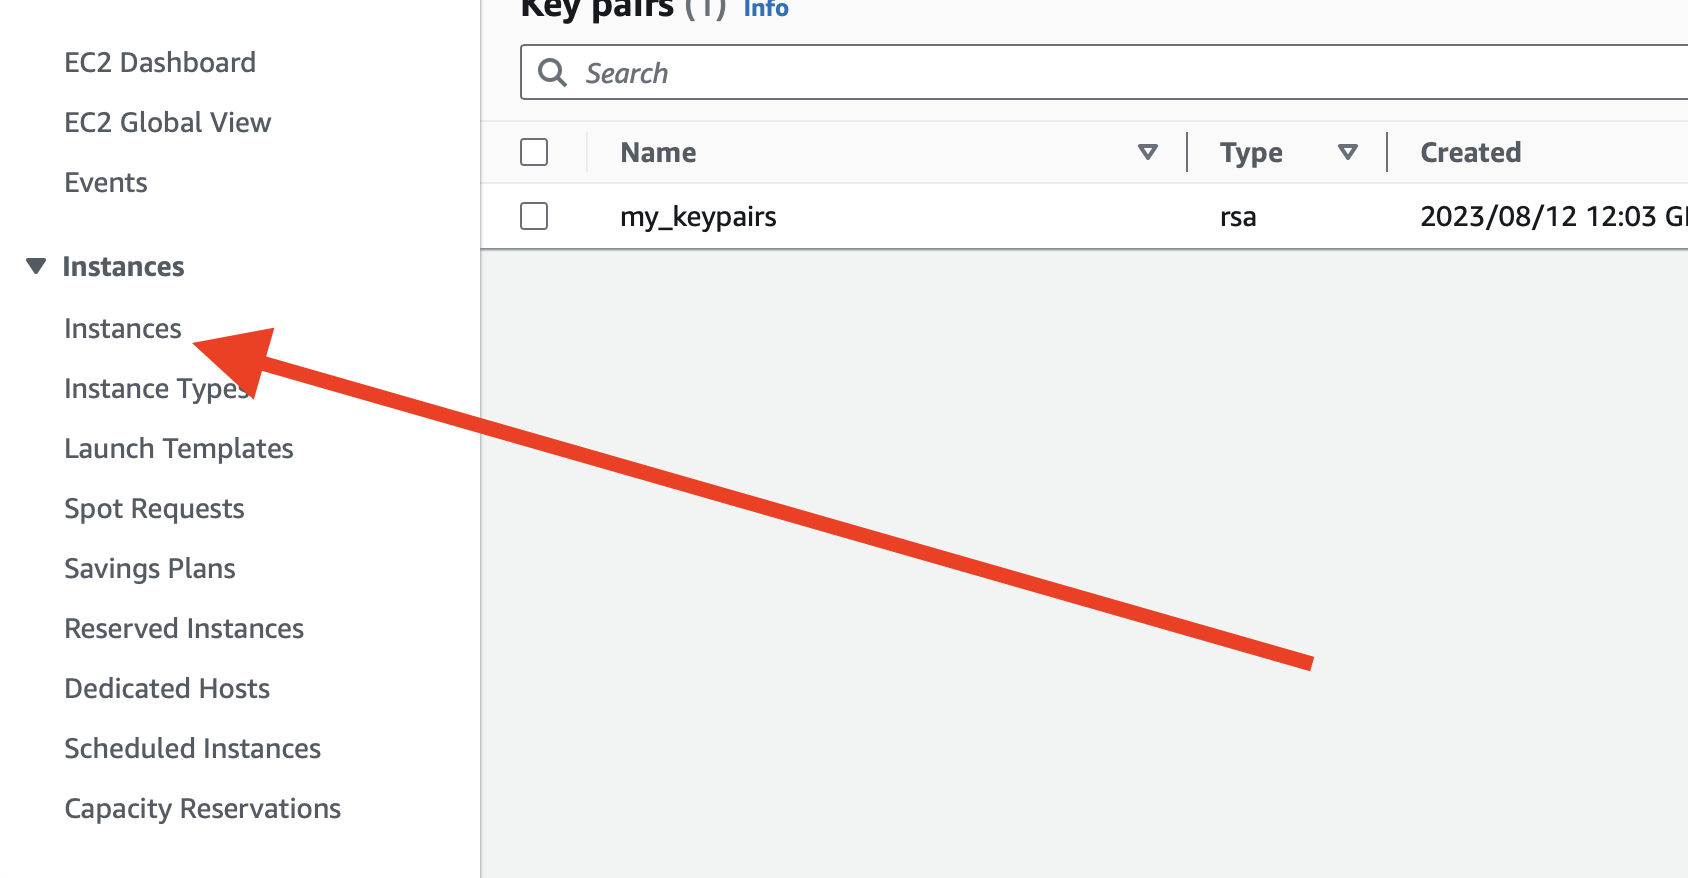
Now, go to the instances page by clicking Instances under Instances:
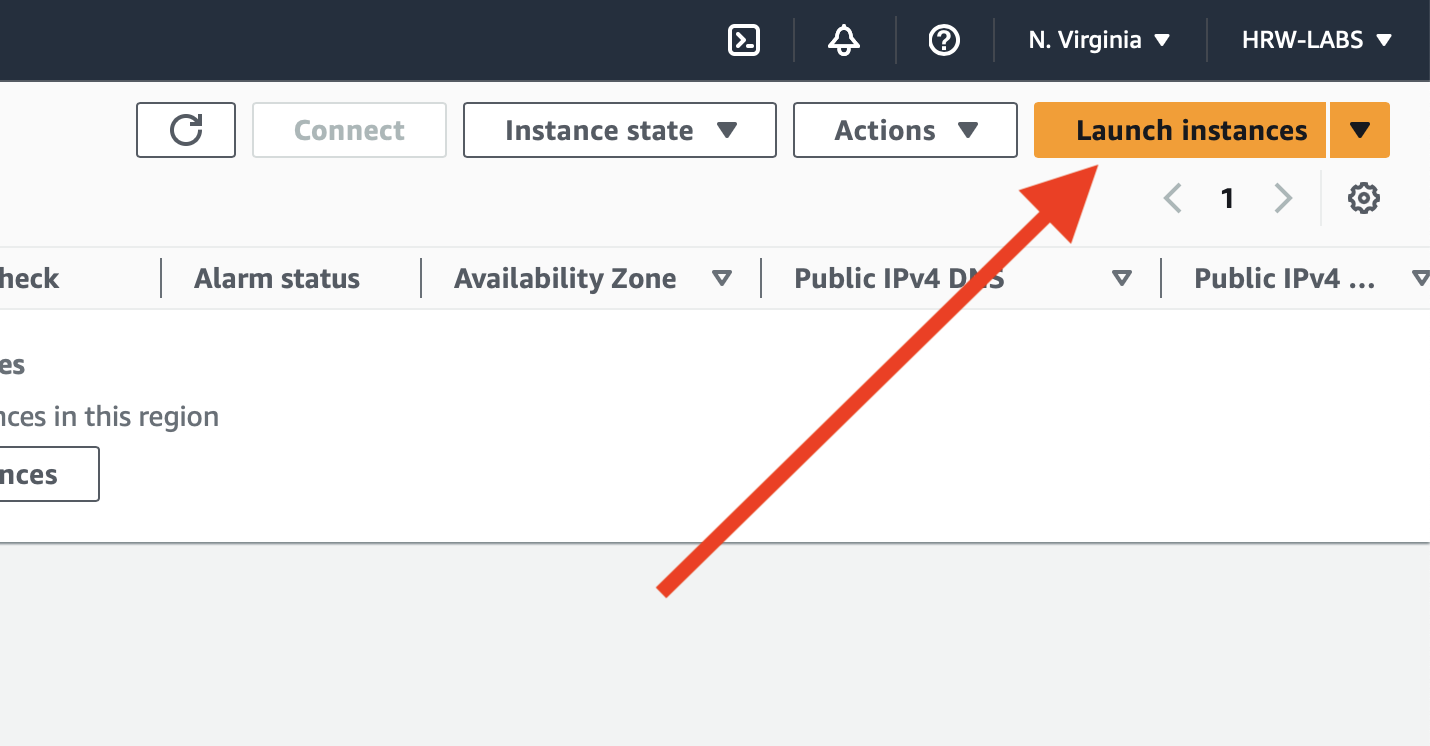
Click the Lunch instance button from the top-right corner:
Now you are on the Lunch instance page:
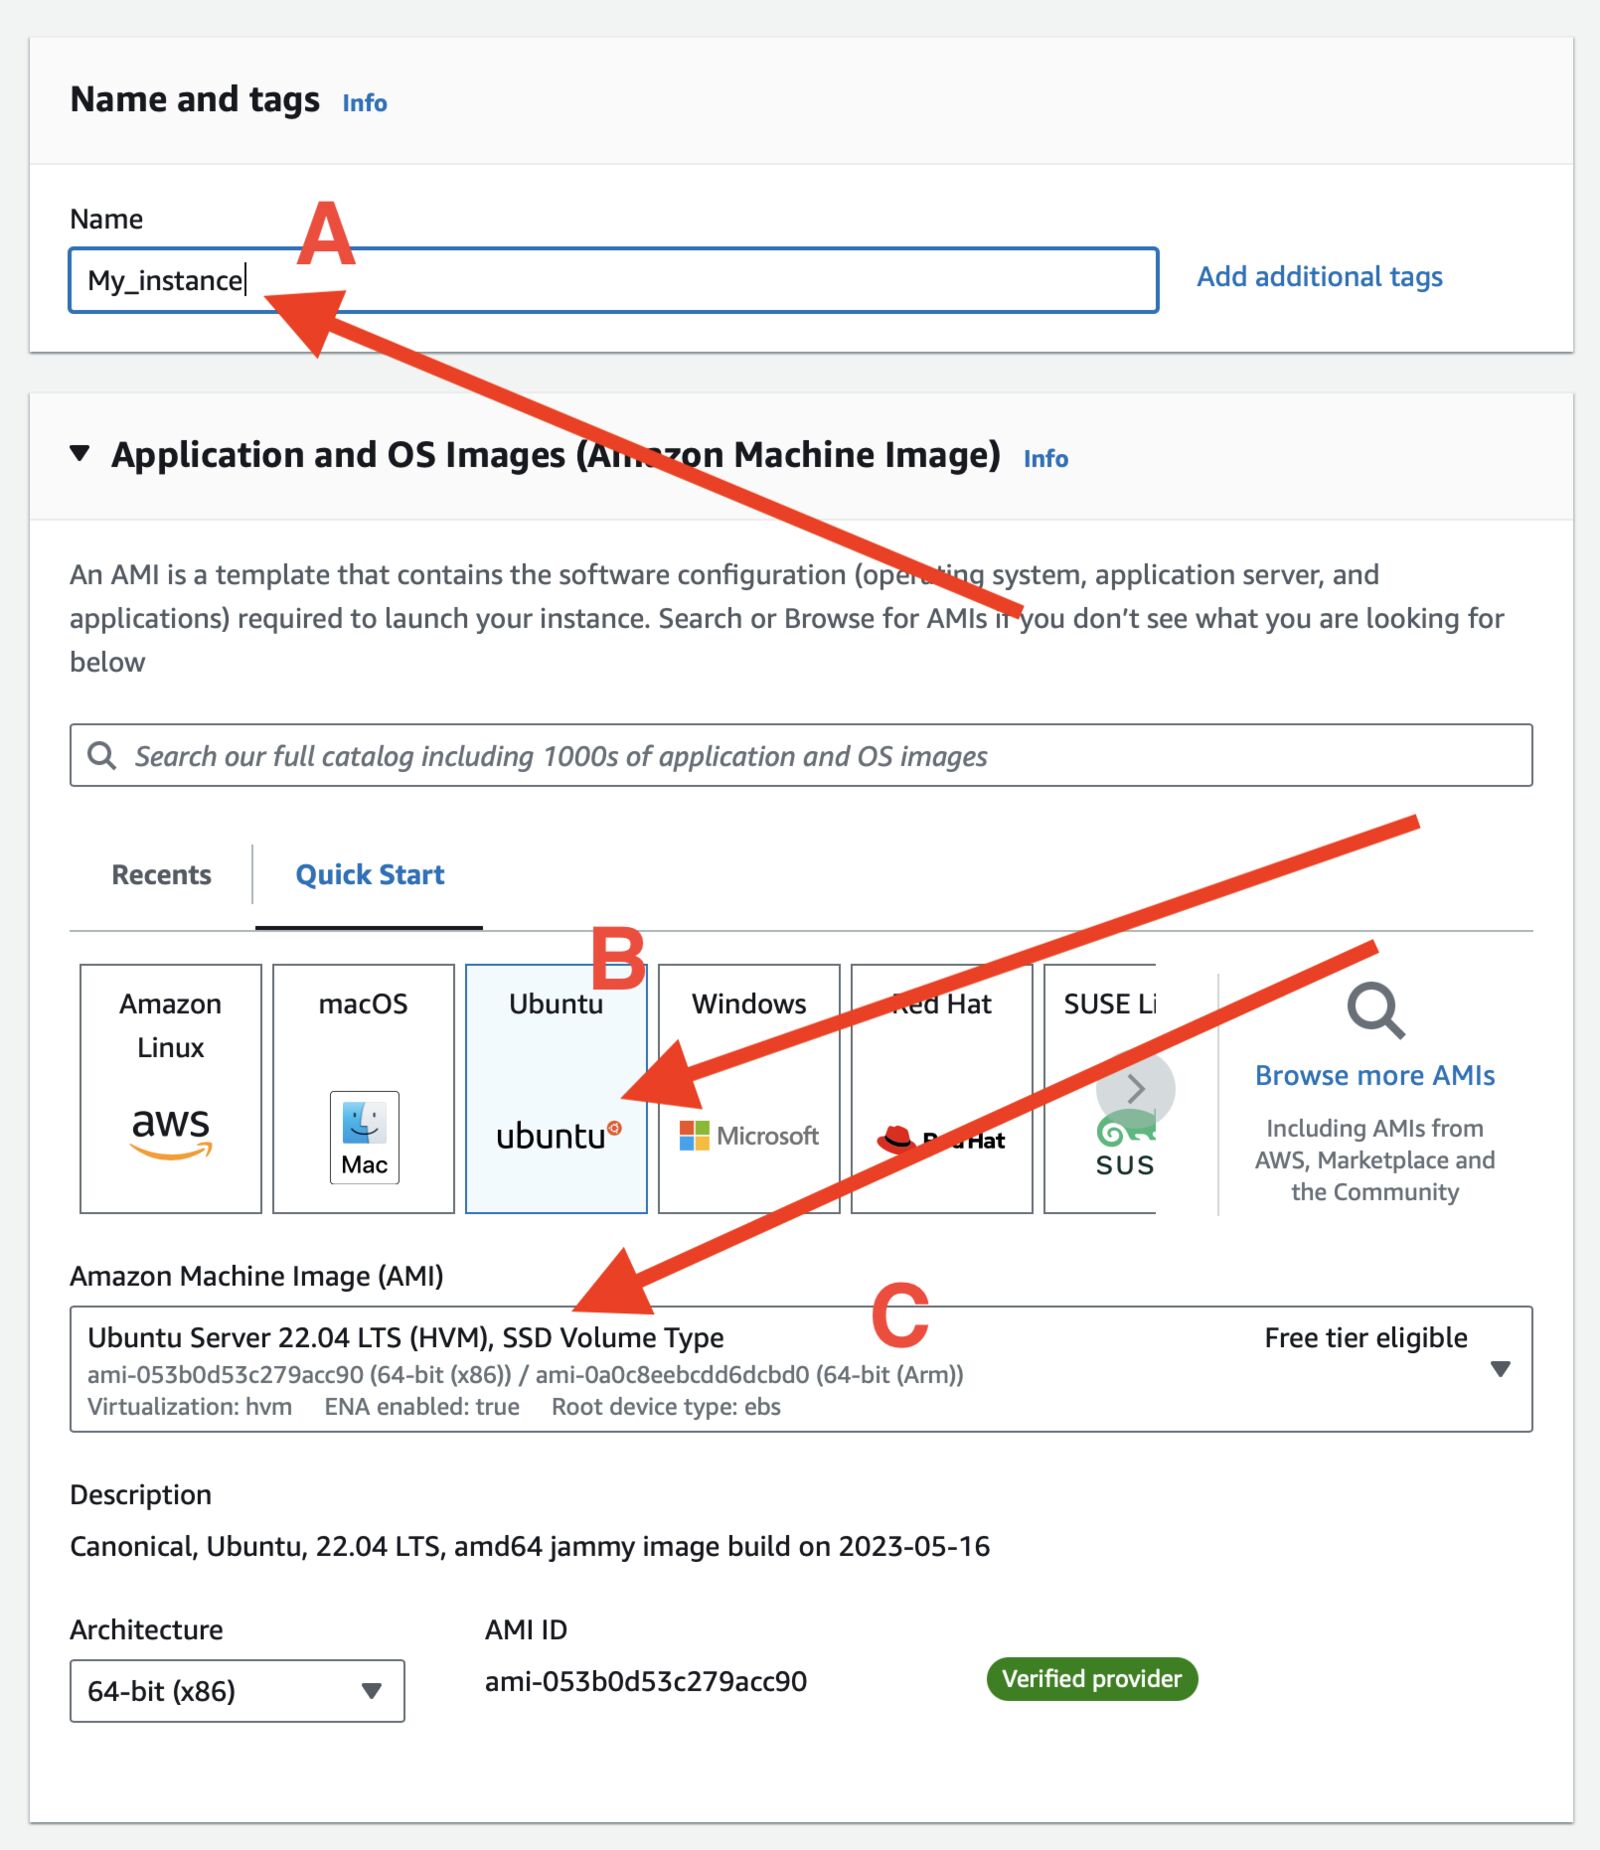
A. Give your instance a name
B. Select Ubuntu
C. Select "Ubuntu Server 22.04 LTS" AMI
In the next section:
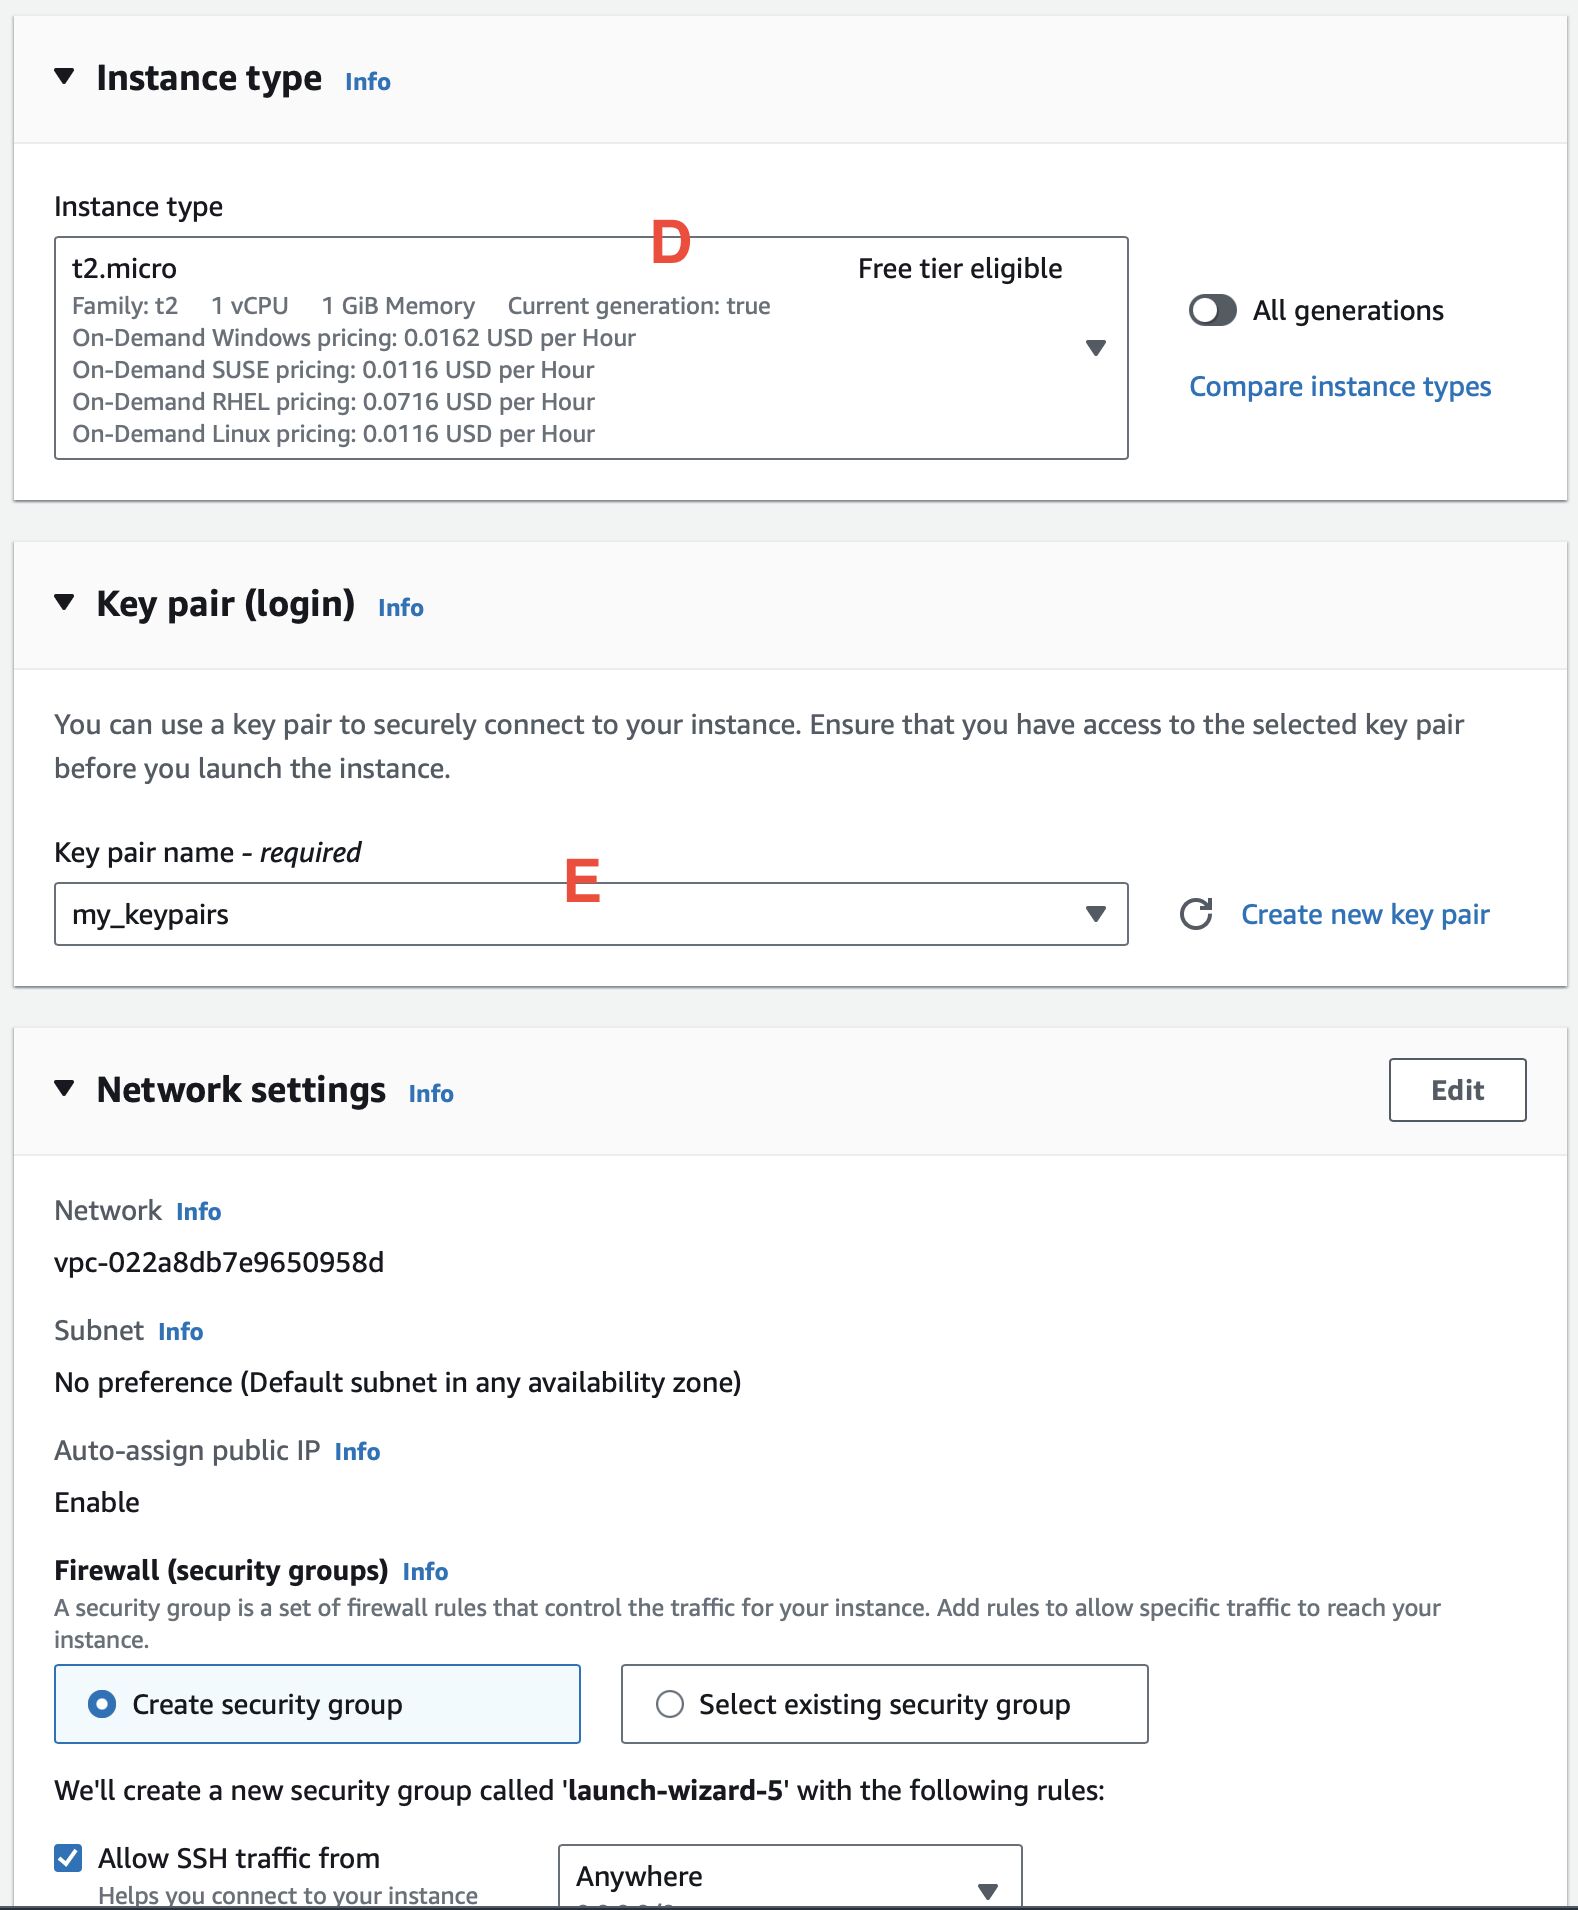
D. Select the instance type; I selected a free-tier eligible "t2.micro".
E. Select the key pairs you selected previously.
Select all of these three checkboxes:
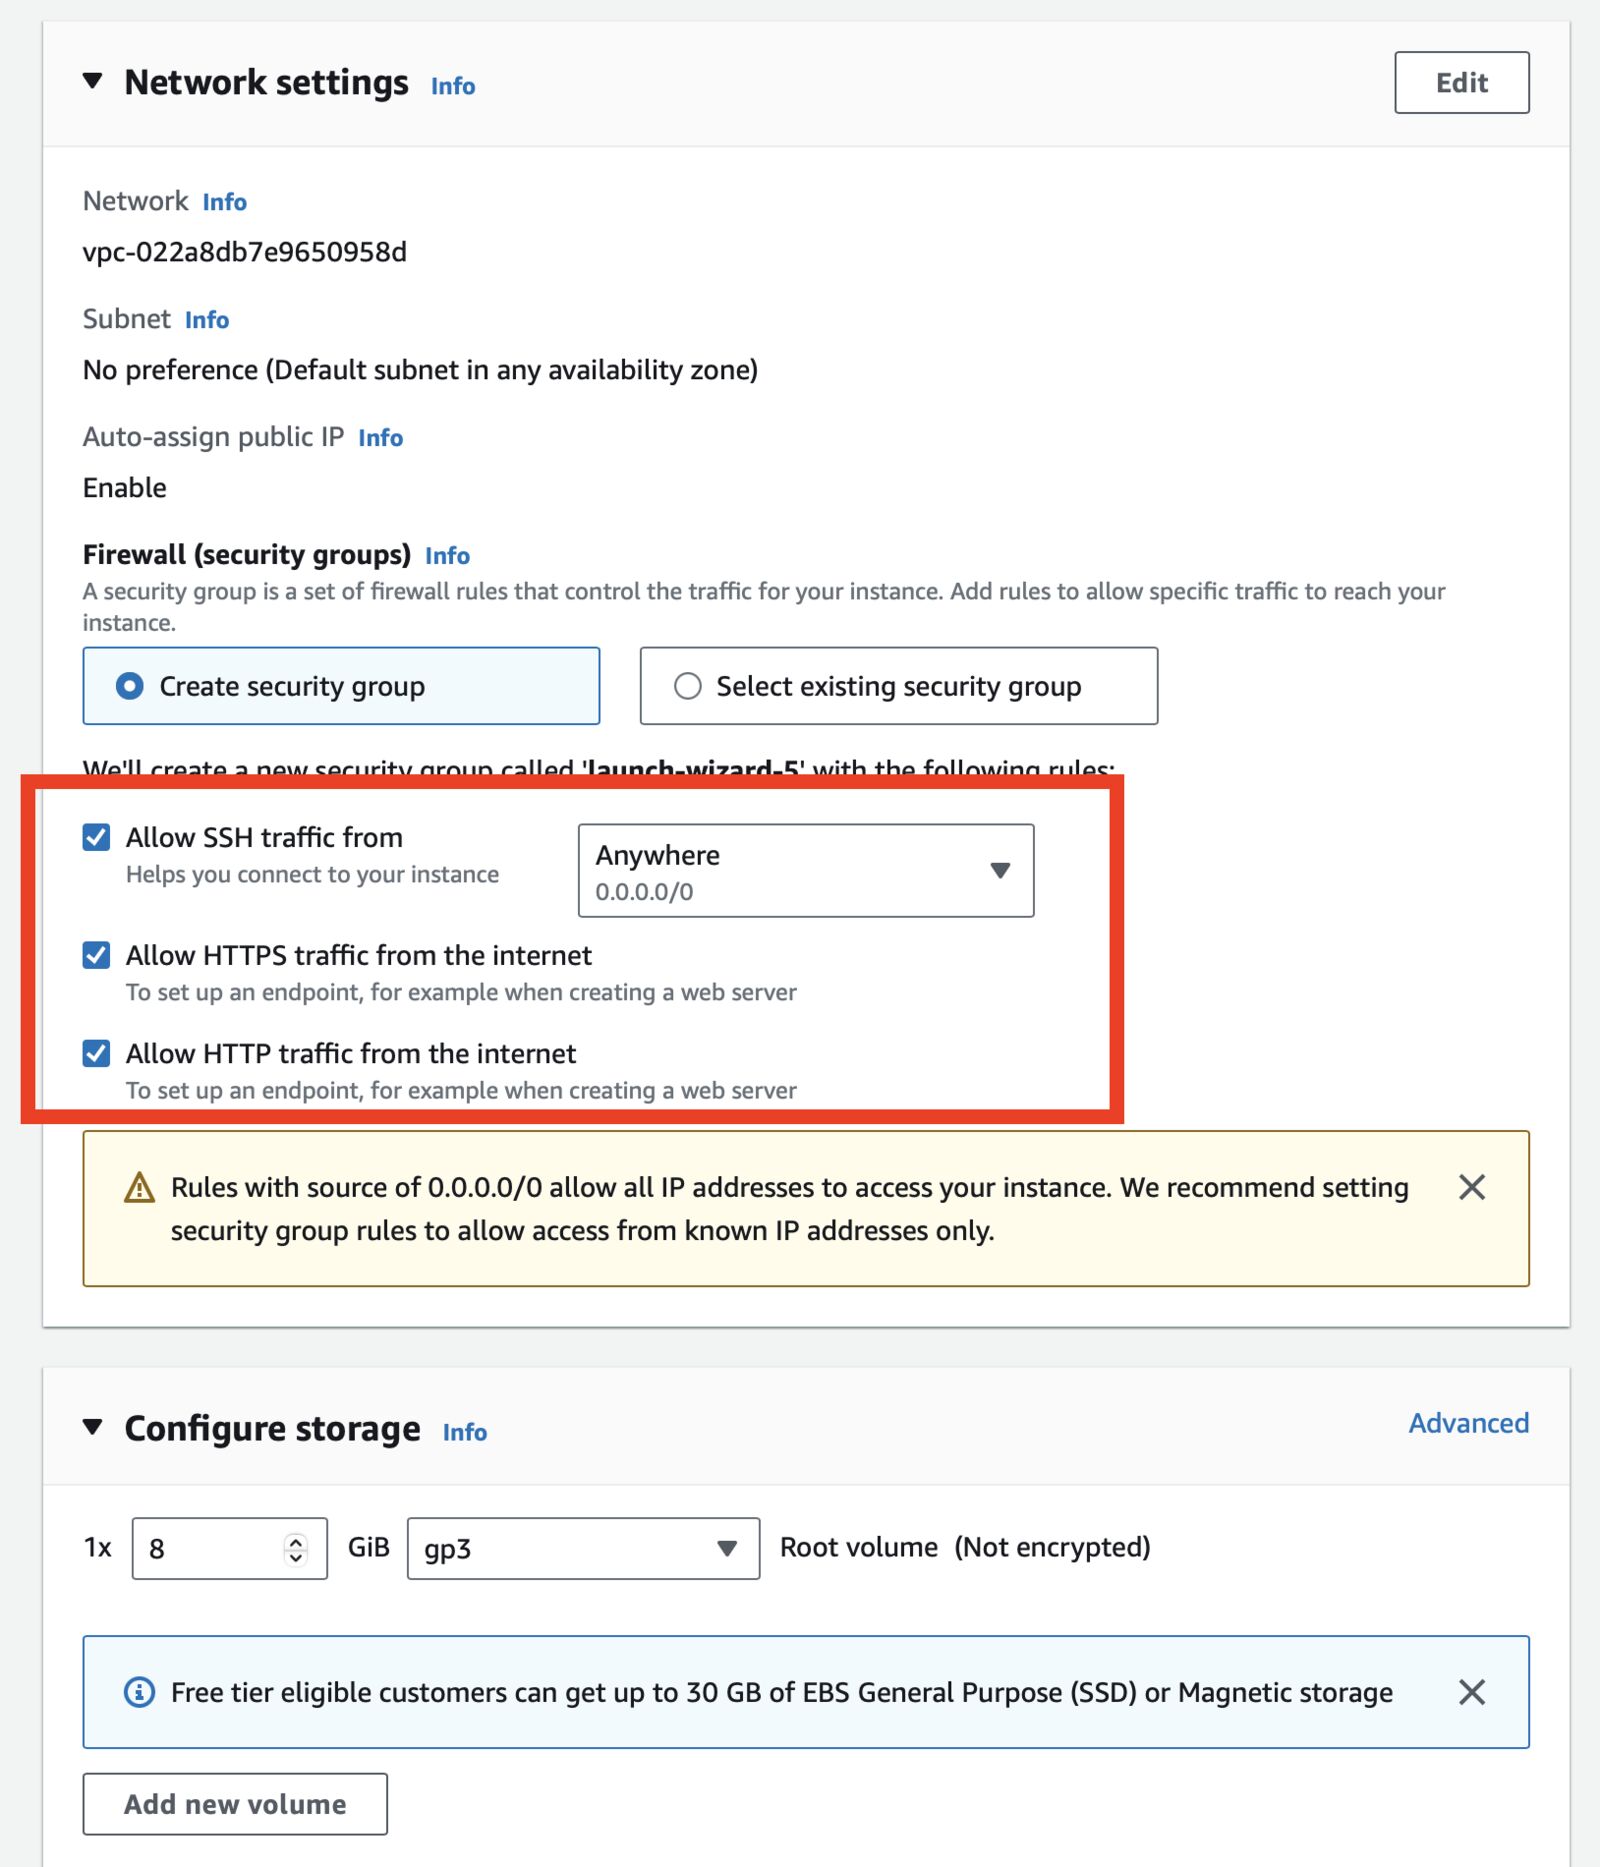
Keep everything else as it is and click on the Lunch instance button from the right sidebar's summary widget:
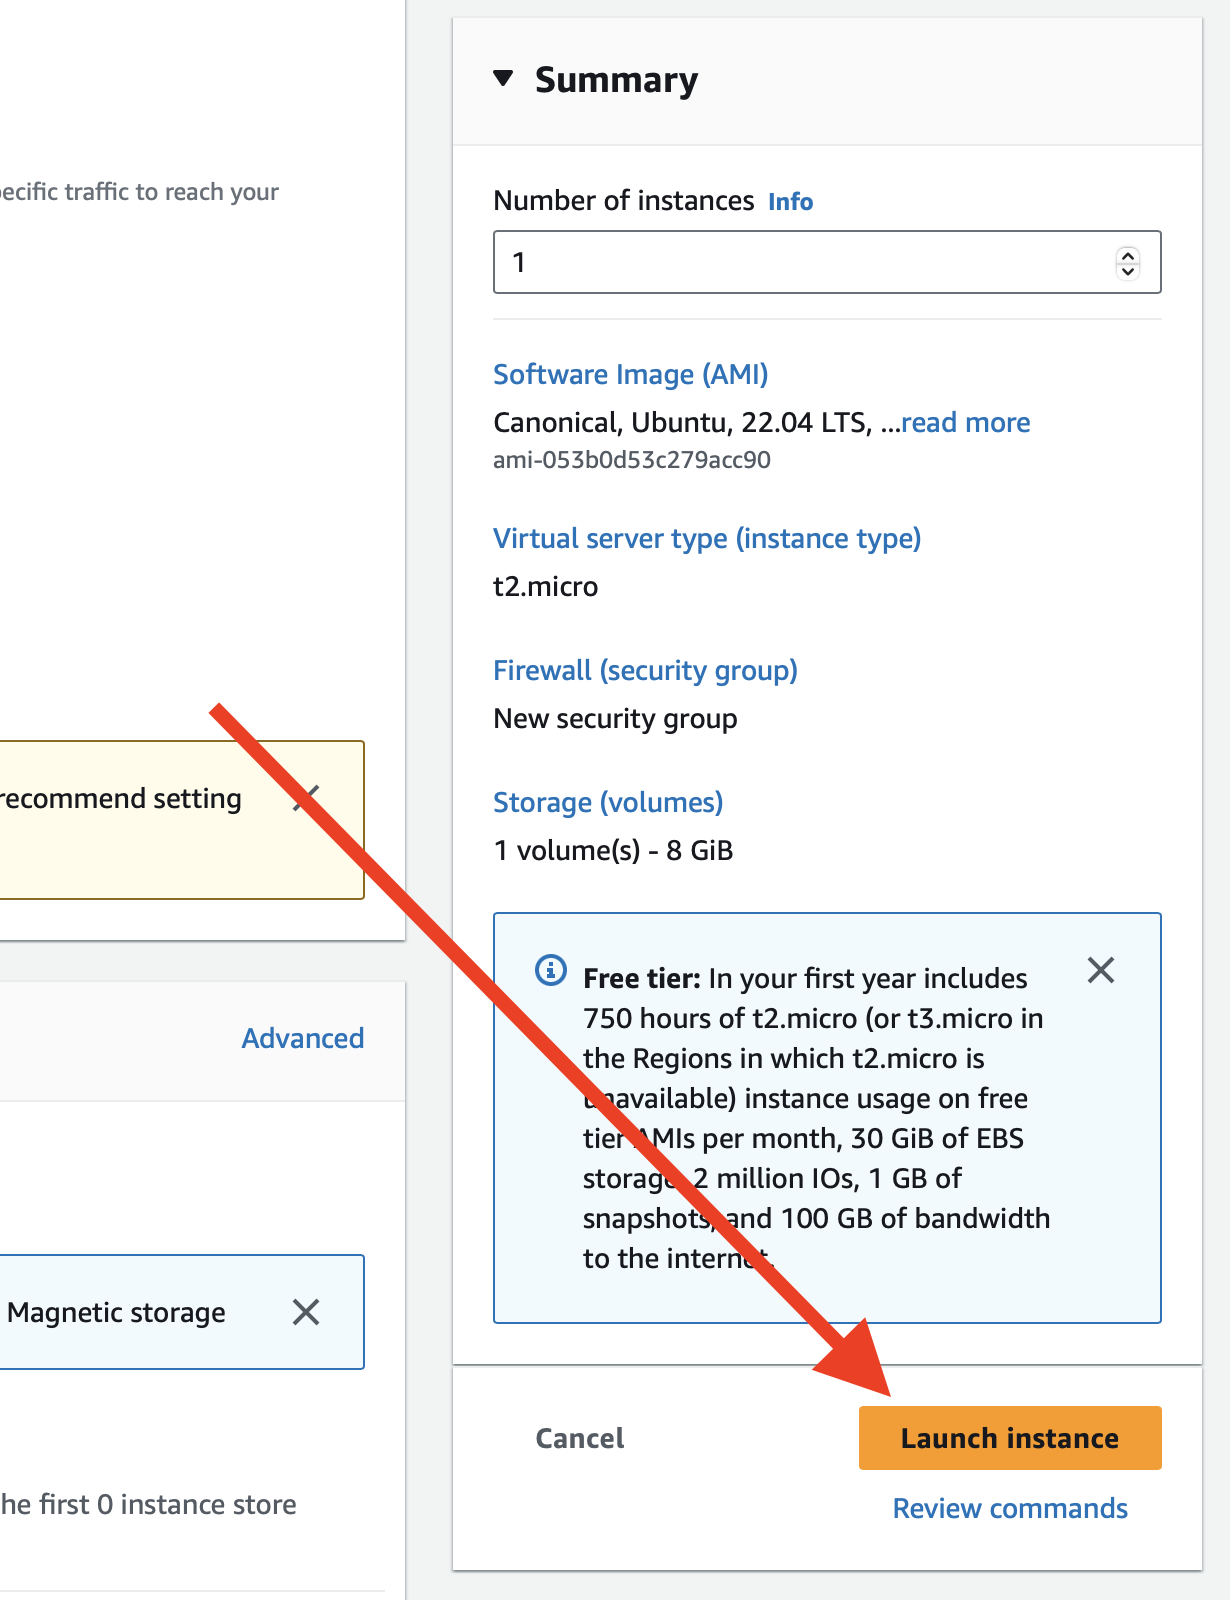
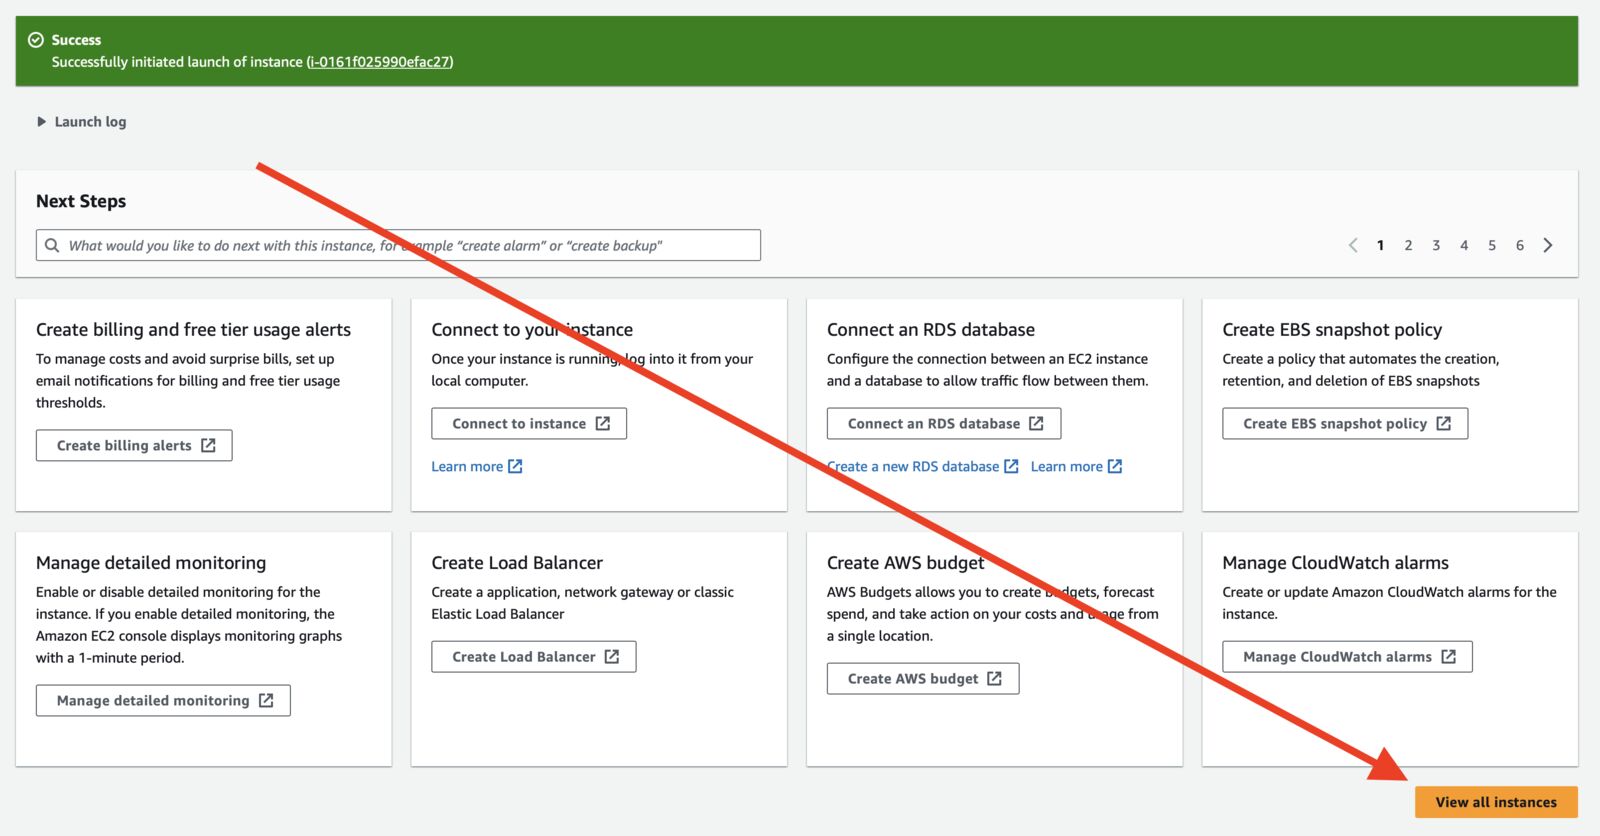
And then click the View all instances button:
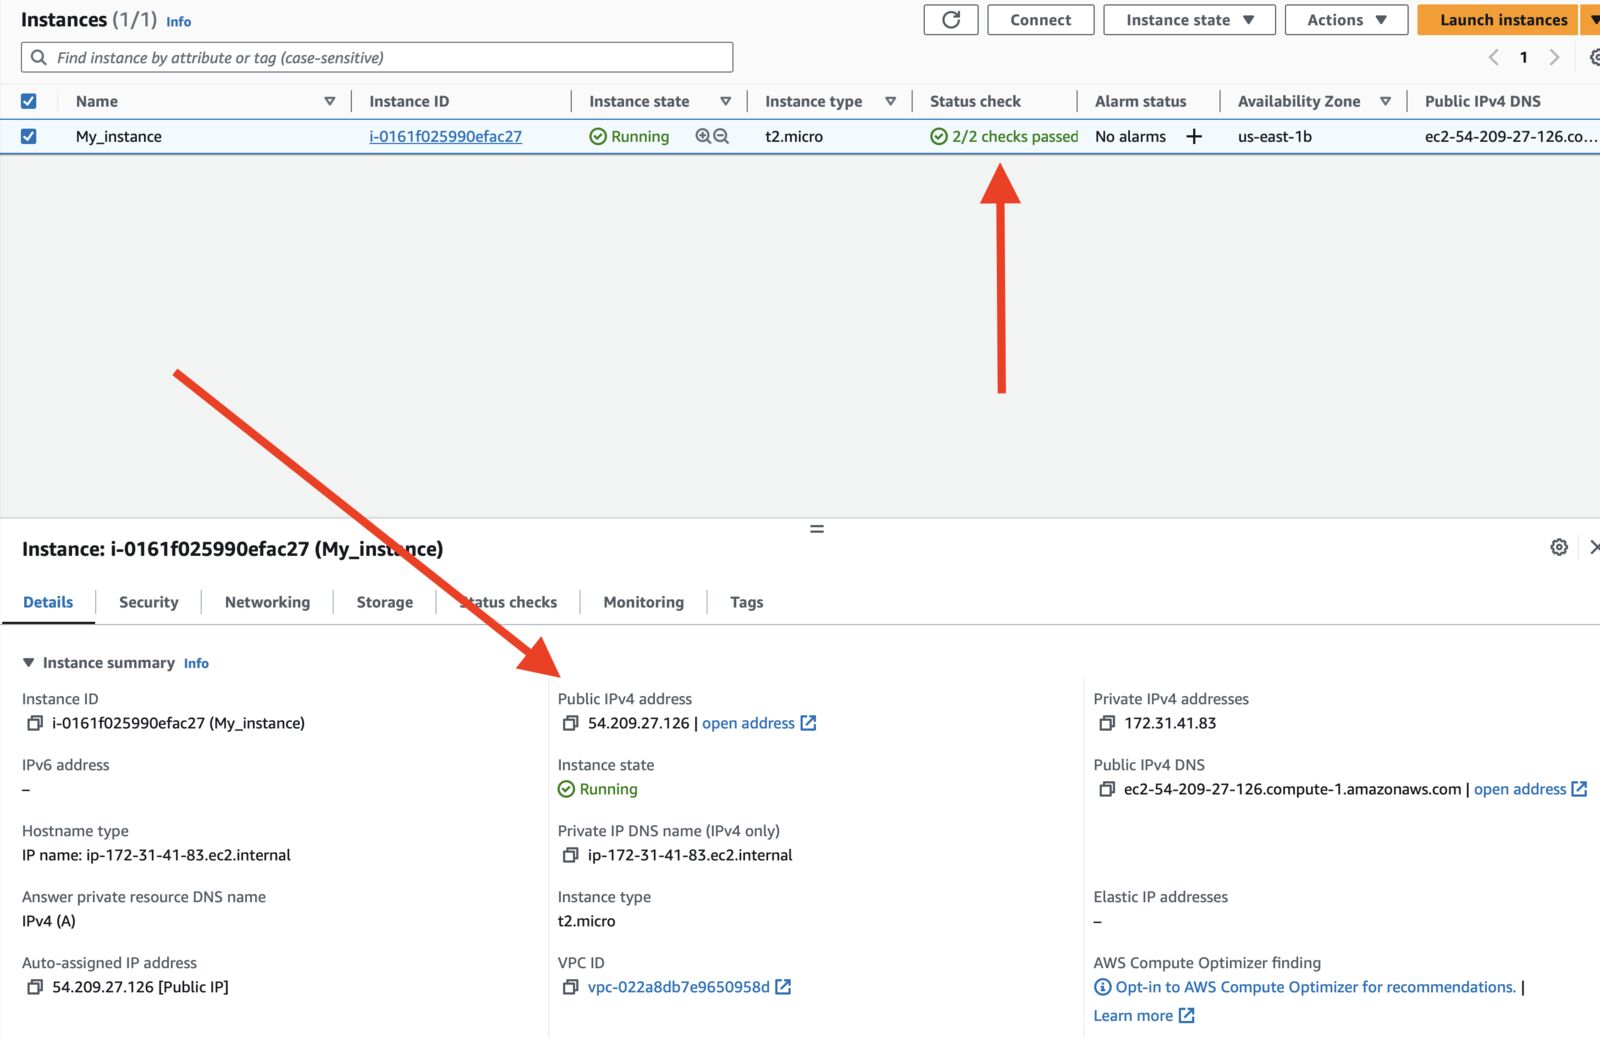
Wait until Status checks turn 2/2 checks passed and copy public_ip in a safe place:
Connect to the instance via SSH
Change permission of your key file
chmod 400 my_keypairs.pem
Run this command by replacing <ip_address> to your instance's public IP address, you have copied before:
ssh -i "my_keypairs.pem" ubuntu@<ip_address>
Enter yes, if you are asked to save your IP to known hosts list. You should be logged in to the instance.
Launch your Laravel app
Install some required packages
 sudo apt-get update
 sudo apt install curl git unzip -y
Let's install PHP 8.1 and its required package to launch the app
 sudo apt install software-properties-common -y
 sudo add-apt-repository ppa:ondrej/php -y
 sudo apt install -y php8.1-fpm \
     php8.1-cli \
     php8.1-mysql \
     php8.1-curl \
     php8.1-xml \
     php8.1-mbstring
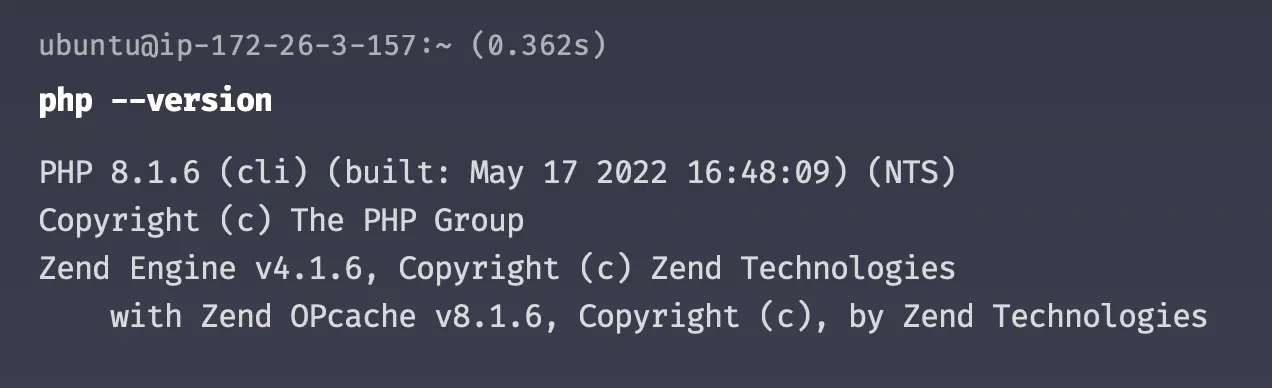
Check the version by using php --version command:
Install composer
curl -sS https://getcomposer.org/installer | php
sudo mv composer.phar /usr/local/bin/composer
sudo chmod +x /usr/local/bin/composer
Install Nginx
sudo apt install nginx -y
Clone your git repository link to an app directory. Replace the value of GIT_REPO and APP_DIR value. Then, run the command.
GIT_REPO=https://github.com/HarunRay/laravel-to-lightsail.git
APP_DIR=laravel-app
cd /var/www/html
sudo git clone "$GIT_REPO" "$APP_DIR"
cd "$APP_DIR"
cp .env.example .env
sudo composer install
Create Nginx config file:
sudo vim /etc/nginx/sites-available/laravel
Paste this code. Change 52.201.59.133 to your IP address and save.
 server {
  listen 80;
  listen [::]:80;
  server_name 52.201.59.133;
  root /var/www/html/laravel-ap/public;

  add_header X-Frame-Options "SAMEORIGIN";
  add_header X-Content-Type-Options "nosniff";

  index index.php;

  charset utf-8;

  location / {
      try_files $uri $uri/ /index.php?$query_string;
  }

  location = /favicon.ico { access_log off; log_not_found off; }
  location = /robots.txt  { access_log off; log_not_found off; }

  error_page 404 /index.php;

  location ~ \.php$ {
      fastcgi_pass unix:/var/run/php/php8.1-fpm.sock;
      fastcgi_param SCRIPT_FILENAME $realpath_root$fastcgi_script_name;
      include fastcgi_params;
  }

  location ~ /\.(?!well-known).* {
      deny all;
  }
 }
Exit the Vim editor by pressing esc and then :wq . Then run this command:
sudo ln -s /etc/nginx/sites-available/laravel /etc/nginx/sites-enabled/
sudo systemctl start nginx
sudo systemctl enable nginx
Set permission for your Laravel app:
cd /var/www/html/laravel-app/
sudo chown -R www-data:www-data .
sudo usermod -a -G www-data ubuntu
sudo find . -type f -exec chmod 644 {} \;
sudo find . -type d -exec chmod 755 {} \;
sudo chgrp -R www-data storage bootstrap/cache
sudo chmod -R ug+rwx storage bootstrap/cache
Now, generate app key:
sudo php artisan key:generate
Open .env file to update:
sudo vim /var/www/html/laravel-app/.env
Now, change these values:
APP_ENV=production
APP_URL=http://52.201.59.133
Exit the Vim editor by pressing esc and the :wq .
Restart Nginx service
sudo service nginx restart
Now, type your public_ip to browser and hit enter. You should see the welcome page. 🚀
...
Conclusion
This article covers the very basic things about launching an instance. If you have any query or you are stuck, feel free to ask in the comment.
If you want to appreciate my work, love ❤️ this post, share it with your friends, subscribe to the newsletter, and keep following updates here on the blog.
I'm searching for the next topic to cover in this blog; if you have an idea, tweet me. Don't forget to follow me on Twitter, I regularly tweet about AWS, Laravel, Cloud, PHP, and various other Software Engineering topics.
On this post
Comments
A reply stays under the note it answers.
No comments yet.
If you have a note on Deploy Laravel Application to Amazon EC2 Instance, sign in and leave it.