I have a production SaaS running on AWS Lambda with Fastify. Single tenant, single customer, everything working great. Then the second customer signed up.
That's when things got interesting. Suddenly every single request needed to answer one question before anything else happened: which tenant does this belong to? Auth and tenant isolation aren't separate concerns. They're the same concern. You can't verify a user's identity without also knowing which tenant they belong to, and you can't enforce tenant boundaries without solid auth.
So I built a multi-tenant auth layer that handles both problems in one pass. Every request flows through a Fastify plugin that identifies the tenant, verifies the caller's credentials, and decorates the request with tenant context. Downstream route handlers never think about auth or tenant resolution. They just read request.tenantId and get to work.
In this post I'll walk through the full implementation. We'll cover the tenant isolation strategy, the database schema, the auth plugin that wires JWT and API key verification together, per-tenant rate limiting, and how individual routes opt into different auth requirements. All the code examples are sanitized but the patterns are running in production right now.
Let's get into it.
 Photo by panumas nikhomkhai on Pexels
The Tenant Isolation Strategy
The core idea is simple. Tenant identity flows through every single request as first-class context. No request gets past the auth layer without a resolved tenantId attached to it.
I support two authentication strategies, and both end up in the same place:
JWT tokens for logged-in users. The token carries the tenant_id right in the claims. When a user logs in, the JWT gets stamped with their tenant. Every subsequent request just verifies the token and reads the claim.
API keys for machine-to-machine calls. The key is hashed and looked up in the database. The matching row has a tenant_id column. So the lookup itself resolves the tenant.
Both paths converge on the same Fastify request decoration:
// Add tenant context to every request
declare module 'fastify' {
  interface FastifyRequest {
    tenantId: string;
    tenantPlan: 'free' | 'pro' | 'enterprise';
  }
}
After the auth plugin runs, every route handler in the entire app can just read request.tenantId and request.tenantPlan. The plan field is especially useful because it drives feature gating and rate limits downstream. A free tenant gets different quotas than an enterprise tenant, and that decision happens once in the auth layer instead of being scattered across individual routes.
This pattern also makes audit logging trivial. Every database query, every log line, every error report can include the tenant ID because it's always available on the request object. No guessing. No passing tenant context through five layers of function calls.
The thing is, this only works if you're disciplined about it. Every table that holds tenant data needs a tenant_id column. Every query needs a WHERE tenant_id = $1 clause. Miss one and you've got a data leak between tenants. More on the schema in the next section.
 Photo by Tima Miroshnichenko on Pexels
The Database Schema
The schema is simple but solid. Three core tables handle all the tenant and auth state:
CREATE TABLE hrr_tenants (
  id UUID PRIMARY KEY DEFAULT gen_random_uuid(),
  name VARCHAR(255) NOT NULL,
  plan VARCHAR(20) NOT NULL DEFAULT 'free'
    CHECK (plan IN ('free', 'pro', 'enterprise')),
  created_at TIMESTAMPTZ NOT NULL DEFAULT NOW()
);

CREATE TABLE hrr_api_keys (
  id UUID PRIMARY KEY DEFAULT gen_random_uuid(),
  tenant_id UUID NOT NULL REFERENCES hrr_tenants(id),
  key_hash VARCHAR(64) NOT NULL,
  name VARCHAR(255) NOT NULL,
  last_used_at TIMESTAMPTZ,
  created_at TIMESTAMPTZ NOT NULL DEFAULT NOW()
);

CREATE UNIQUE INDEX idx_hrr_api_keys_hash ON hrr_api_keys(key_hash);

CREATE TABLE hrr_users (
  id UUID PRIMARY KEY DEFAULT gen_random_uuid(),
  tenant_id UUID NOT NULL REFERENCES hrr_tenants(id),
  email VARCHAR(255) NOT NULL,
  role VARCHAR(20) NOT NULL DEFAULT 'member'
    CHECK (role IN ('owner', 'admin', 'member')),
  created_at TIMESTAMPTZ NOT NULL DEFAULT NOW()
);

CREATE UNIQUE INDEX idx_hrr_users_email ON hrr_users(email);
A few things worth calling out.
The key_hash column stores a SHA-256 hash of the API key, never the plaintext. Why? If someone gets read access to your database (SQL injection, leaked backup, compromised replica), they still can't use the API keys. The hash is one-way. This is the same reason you hash passwords, and it's just as important for API keys.
The unique index on key_hash is critical for performance. Every API key request triggers a lookup by hash. Without the index, that's a full table scan on every authenticated request. With it, it's an O(1) index seek.
Notice that both hrr_api_keys and hrr_users have a tenant_id foreign key. This is the pattern I mentioned earlier. Every table that holds tenant data gets a tenant_id column. It feels redundant sometimes, especially when you could derive it through a join. But the explicit column makes queries simpler, makes accidental cross-tenant data access harder, and makes row-level security policies straightforward if you ever need them.
 Photo by Brett Sayles on Pexels
The Auth Plugin
This is the heart of the whole system. A single Fastify plugin that resolves tenant context and verifies credentials for every protected request.
import fp from 'fastify-plugin';
import jwt from 'jsonwebtoken';
import crypto from 'crypto';
import type { FastifyInstance, FastifyRequest, FastifyReply } from 'fastify';

async function authPlugin(fastify: FastifyInstance) {
  // Decorate the request with tenant context
  fastify.decorateRequest('tenantId', '');
  fastify.decorateRequest('tenantPlan', 'free');

  fastify.decorate(
    'authenticate',
    async (request: FastifyRequest, reply: FastifyReply) => {
      const authHeader = request.headers.authorization;

      if (!authHeader) {
        return reply
          .status(401)
          .send({ message: 'Authentication required' });
      }

      if (authHeader.startsWith('Bearer ')) {
        await verifyJwt(fastify, request, reply, authHeader.slice(7));
      } else if (authHeader.startsWith('ApiKey ')) {
        await verifyApiKey(fastify, request, reply, authHeader.slice(7));
      } else {
        return reply
          .status(401)
          .send({ message: 'Authentication failed' });
      }
    }
  );
}

// Wrap with fastify-plugin to break encapsulation
export default fp(authPlugin, {
  name: 'auth-plugin',
  dependencies: ['database-plugin'],
});
The fp() wrapper from fastify-plugin is important. By default, Fastify encapsulates plugins so their decorators are only visible within the plugin's own scope. Wrapping with fp() breaks that encapsulation and makes fastify.authenticate available to every route in the app. Without it, your route handlers can't access the auth decorator.
The dependencies array tells Fastify that this plugin requires the database plugin to be registered first. If you accidentally register them in the wrong order, Fastify throws a clear error at startup instead of failing silently at runtime.
Notice the request decoration pattern. I call decorateRequest with default values during plugin registration. Fastify needs to know about these properties at startup so it can optimize the request object's internal shape. Then the authenticate preHandler fills in the real values on each request. This two-phase approach (declare shape at startup, populate at request time) is how Fastify keeps its request handling fast.
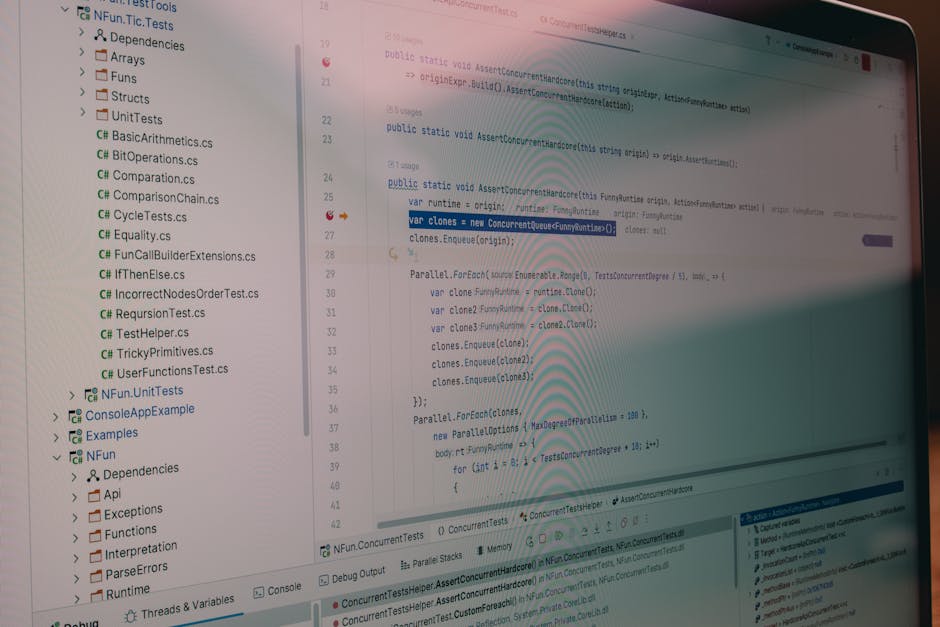 Photo by Daniil Komov on Pexels
JWT Strategy
The JWT carries everything the auth layer needs to resolve a tenant without hitting the database on every request.
Here's the token payload structure:
interface HrrTokenPayload {
  sub: string;       // userId
  tenant_id: string; // tenantId
  plan: 'free' | 'pro' | 'enterprise';
  iat: number;
  exp: number;
}
The signing secret lives in AWS Secrets Manager. I fetch it once during Lambda cold start and cache it for the lifetime of the container:
import {
  SecretsManagerClient,
  GetSecretValueCommand,
} from '@aws-sdk/client-secrets-manager';

const smClient = new SecretsManagerClient();
let cachedJwtSecret: string | null = null;

async function getJwtSecret(): Promise<string> {
  if (cachedJwtSecret) return cachedJwtSecret;

  const response = await smClient.send(
    new GetSecretValueCommand({
      SecretId: process.env.JWT_SECRET_ARN,
    })
  );

  cachedJwtSecret = response.SecretString!;
  return cachedJwtSecret;
}
Why Secrets Manager instead of Parameter Store? Secrets Manager supports automatic rotation. You can set up a Lambda rotation function that generates a new signing key on a schedule. Parameter Store doesn't have that built in.
Token generation happens at login:
async function generateToken(user: {
  id: string;
  tenantId: string;
  tenantPlan: string;
}): Promise<string> {
  const secret = await getJwtSecret();
  return jwt.sign(
    { sub: user.id, tenant_id: user.tenantId, plan: user.tenantPlan },
    secret,
    { expiresIn: '24h' }
  );
}
And verification in the auth plugin:
async function verifyJwt(
  fastify: FastifyInstance,
  request: FastifyRequest,
  reply: FastifyReply,
  token: string
) {
  try {
    const secret = await getJwtSecret();
    const payload = jwt.verify(token, secret) as HrrTokenPayload;
    request.tenantId = payload.tenant_id;
    request.tenantPlan = payload.plan;
  } catch {
    return reply.status(401).send({ message: 'Authentication failed' });
  }
}
The tenant ID and plan come straight from the token claims. No database query needed. This is the fastest auth path and it's what every browser-based user hits.
 Photo by Roger Brown on Pexels
API Key Strategy
API keys are for machine-to-machine calls. CI/CD pipelines, third-party integrations, webhook consumers. Anything that doesn't have a human logging in.
The key format uses a recognizable prefix so developers can immediately tell what kind of credential they're looking at:
import crypto from 'crypto';

function generateApiKey(): {
  plaintext: string;
  hash: string;
} {
  const raw = crypto.randomBytes(32).toString('hex');
  const plaintext = `hrr_live_${raw}`;
  const hash = crypto
    .createHash('sha256')
    .update(plaintext)
    .digest('hex');

  return { plaintext, hash };
}
The hrr_live_ prefix followed by 32 hex bytes gives you 64 characters of randomness. That's 256 bits of entropy, which is more than enough to make brute-force attacks impractical.
When a user creates an API key through the dashboard, the plaintext is returned exactly once in the response. Only the SHA-256 hash gets stored in hrr_api_keys. If the user loses the key, they generate a new one. No recovery. No "show me my key again." This is the same model GitHub and Stripe use.
The lookup on each request is a single indexed query:
async function verifyApiKey(
  fastify: FastifyInstance,
  request: FastifyRequest,
  reply: FastifyReply,
  key: string
) {
  const hash = crypto
    .createHash('sha256')
    .update(key)
    .digest('hex');

  const result = await fastify.pg.query(
    `SELECT ak.tenant_id, t.plan
     FROM hrr_api_keys ak
     JOIN hrr_tenants t ON t.id = ak.tenant_id
     WHERE ak.key_hash = $1`,
    [hash]
  );

  if (result.rows.length === 0) {
    return reply.status(401).send({ message: 'Authentication failed' });
  }

  const row = result.rows[0];
  request.tenantId = row.tenant_id;
  request.tenantPlan = row.plan;

  // Fire-and-forget: update last_used_at
  fastify.pg
    .query(
      'UPDATE hrr_api_keys SET last_used_at = NOW() WHERE key_hash = $1',
      [hash]
    )
    .catch(() => {});
}
A few things to notice. The query uses a parameterized placeholder ($1), not string interpolation. This prevents SQL injection and it also helps RDS Proxy with connection pooling because the query plan can be cached and reused. The last_used_at update is fire-and-forget. It's useful for the dashboard ("this key was last used 3 hours ago") but it shouldn't add latency to the actual request. If the update fails for some reason, we swallow the error and move on.
The join with hrr_tenants in the lookup query is intentional. It loads the tenant plan in the same round trip. One query, one network hop, and the request has full tenant context.
 Photo by Zulfugar Karimov on Pexels
Per-Tenant Rate Limiting
Once you have tenant context on every request, rate limiting by tenant is straightforward. I use @fastify/rate-limit with a custom key function:
import rateLimit from '@fastify/rate-limit';

await app.register(rateLimit, {
  global: true,
  max: (request: FastifyRequest) => {
    switch (request.tenantPlan) {
      case 'enterprise':
        return 5000;
      case 'pro':
        return 1000;
      case 'free':
      default:
        return 100;
    }
  },
  timeWindow: '1 minute',
  keyGenerator: (request: FastifyRequest) => {
    return request.tenantId || request.ip;
  },
  errorResponseBuilder: (_request, context) => ({
    statusCode: 429,
    error: 'Too Many Requests',
    message: `Rate limit exceeded. Retry in ${context.after}`,
  }),
});
The keyGenerator uses the tenant ID as the rate limit bucket key. All requests from the same tenant share a single counter, regardless of which user or API key made the call. This prevents a single tenant from burning through shared resources, even if they spread their traffic across multiple API keys.
The fallback to request.ip handles unauthenticated endpoints like the login route. You still want rate limiting on those to prevent brute-force attacks.
The max function reads request.tenantPlan to set different limits per pricing tier. Free tenants get 100 requests per minute. Pro gets 1,000. Enterprise gets 5,000. These numbers are tuned for my workload, but the pattern works for any tier-based pricing model.
One thing I like about this approach is that upgrading a tenant's rate limit is just a database update. Change their plan from free to pro in hrr_tenants, and the next request they make automatically gets the higher limit. No redeployment needed.
 Photo by photopach mx on Pexels
Protecting Routes
Individual routes opt into auth by adding preHandler hooks. This gives you fine-grained control over which endpoints require authentication and what kind.
A route that requires JWT only (browser sessions):
app.get('/api/dashboard', {
  preHandler: [app.authenticate],
  schema: {
    tags: ['Dashboard'],
    security: [{ bearerAuth: [] }],
  },
  handler: async (request, reply) => {
    const data = await getDashboard(request.tenantId);
    return reply.send(data);
  },
});
A route that accepts both JWT and API key:
app.post('/api/events', {
  preHandler: [app.authenticate],
  schema: {
    tags: ['Events'],
    security: [{ bearerAuth: [] }, { apiKeyAuth: [] }],
    body: {
      type: 'object',
      required: ['type', 'payload'],
      properties: {
        type: { type: 'string' },
        payload: { type: 'object' },
      },
    },
  },
  handler: async (request, reply) => {
    await ingestEvent(request.tenantId, request.body);
    return reply.status(201).send({ status: 'accepted' });
  },
});
A public route with no auth:
app.get('/api/health', {
  schema: {
    tags: ['System'],
  },
  handler: async (_request, reply) => {
    return reply.send({ status: 'ok', timestamp: new Date().toISOString() });
  },
});
The security field in the schema doesn't enforce anything by itself. That's the preHandler's job. But it documents the auth requirements in the generated OpenAPI spec, which means your Swagger UI shows developers exactly which credentials each endpoint expects. The schema and the actual enforcement stay in the same route definition, so they can't drift apart.
For routes that need both auth and additional authorization (like "only tenant owners can delete API keys"), I stack multiple preHandlers:
app.delete('/api/keys/:keyId', {
  preHandler: [app.authenticate, requireRole('owner')],
  handler: deleteApiKeyHandler,
});
The hooks run in order. First authenticate, then check the role. If either fails, the request stops and the handler never runs.
 Photo by Tima Miroshnichenko on Pexels
What I Learned
After running this in production with real tenants, here are the lessons that stuck with me.
Hash API keys immediately on generation, and never store plaintext. This sounds obvious, but I've seen production codebases that store raw API keys in a credentials column. If your database leaks, those keys are usable instantly. SHA-256 hashing costs almost nothing at request time and makes a breach significantly less damaging.
Put tenant_id in every table that holds tenant data, even when it feels redundant. I initially tried deriving tenant context through joins. It works until you write one query that forgets the join, and suddenly you're returning data across tenants. The explicit column makes every query self-contained and auditable.
RDS Proxy is non-negotiable with Lambda. Each Lambda container opens its own database connection. Under burst traffic, hundreds of containers spin up simultaneously. Without RDS Proxy multiplexing those connections, you'll hit max_connections in seconds. Use parameterized queries too. They let RDS Proxy reuse prepared statements across connections, which prevents connection exhaustion under load.
Test with two tenants in staging before you think it works. Single-tenant testing hides a whole class of bugs. Create two test tenants, generate API keys for both, and verify that tenant A's key can never access tenant B's data. This caught three bugs for me that unit tests missed entirely.
 Photo by Max Fischer on Pexels
Wrapping Up
Multi-tenant auth is one of those things that's straightforward in concept but full of sharp edges in practice. The Fastify plugin system makes it manageable. You write the auth logic once, register it as a plugin, and every route in your app gets tenant-aware security for free.
Hope you enjoyed this walkthrough. If you're building something similar or have questions about any of these patterns, feel free to drop a comment below.
Follow me on Twitter/X for more posts about AWS, serverless architecture, and building SaaS products.
 Photo by ThisIsEngineering on Pexels

On this post
Comments
A reply stays under the note it answers.
No comments yet.
If you have a note on Building a Multi-Tenant SaaS Auth Layer on AWS Lambda with Fastify, sign in and leave it.